General
4 Valentine's Day Card Ideas You Can Make Online
Four Valentine's card designs you can make in a browser in under fifteen minutes each, using your own photos and a free background remover.
A card you made yourself lands differently from a card you bought. That is the whole reason to do this, and it does not require design skill — it requires one good photo and about fifteen minutes.
All four ideas below use the same technique: cut the subject out of a photo, put it somewhere better, add a few words. Here is how to do each one.
Cut a photo out of its background to start →
What you need
- One or two photos you like.
- A browser.
- Any free design tool for the layout.
- Optionally, a printer and some thick paper.
That is it. No subscriptions, no design experience.
The technique behind all four
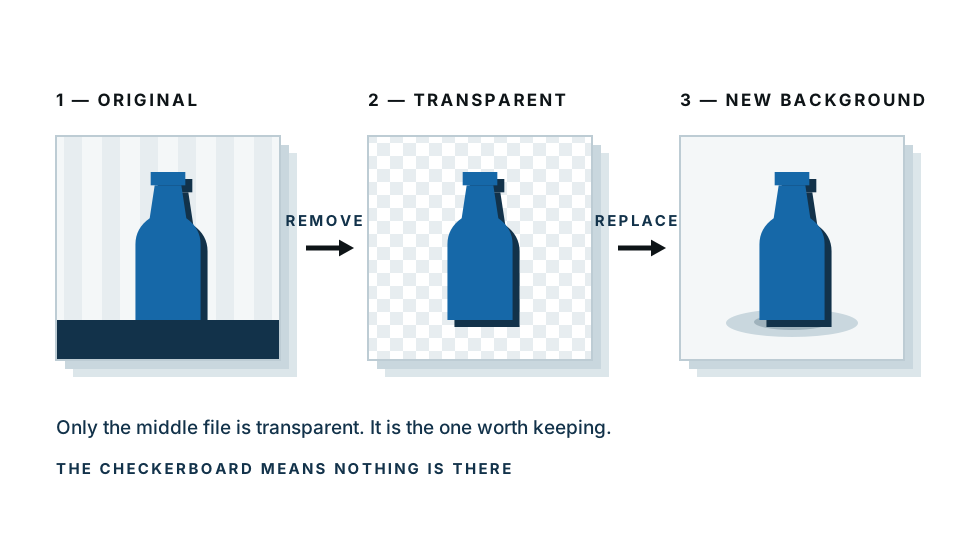
Every idea here depends on a cutout — a photo with the background removed, saved as a transparent PNG. This is what lets you place a person on a colour, a pattern, or inside a shape, without an ugly rectangle around them.
Making one takes about ten seconds:
- Open the background remover.
- Drop your photo in.
- Download the PNG.
The free preview runs entirely inside your browser, so photos of your partner, your children or your family never get uploaded anywhere. For personal photos that seemed worth building.
Idea 1: The cutout portrait card
Time: 10 minutes. Difficulty: easiest. Best for: a partner.
A photo of the two of you, cut out and placed on a single strong colour. Simple, modern, and it looks far more expensive than the effort involved.
How to make it
- Pick a photo where you are both fully in frame with some space around you. Arms out, laughing, mid-movement — energy reads better than a posed shot.
- Remove the background and download the PNG.
- Make a card-shaped canvas. A6 portrait at 300 DPI is 1240 × 1748 pixels. For a digital card, 1080 × 1350 is fine.
- Fill the background with one colour. Deep red is traditional; dusty pink, terracotta or forest green look more considered. Pull a colour from your clothing in the photo and it will always harmonise.
- Place the cutout large. It should fill most of the card and can run off the bottom edge — that overlap is what makes it look designed.
- Add a few words at the top, in one font, large. “Still you.” “Ten years.” Whatever is true.
The detail that makes it
Add a soft shadow beneath the cutout. Not a hard drop shadow — a wide, faint blur just under the feet or the lower edge. It grounds the subject so it looks placed rather than floating.
Idea 2: The photo-in-a-heart card
Time: 15 minutes. Difficulty: easy. Best for: anyone, including friends and family.
A heart shape filled with your photo, on a plain background.
How to make it
- Choose a photo with the subject centred. This crops hard, so anything at the edges will be lost.
- In your design tool, add a heart shape — every free editor has one in its shapes library.
- Use the shape as a frame or mask and drop your photo inside it. In most tools you drag the image onto the shape and it fills it automatically.
- Put it on a plain background — cream, white, or a soft colour.
- Add a thin border around the heart in a contrasting colour if it needs definition.
- Text underneath, small and centred.
Variation: a heart made of many photos
Fill the heart with a grid of small photos rather than one. Cut each one out first so the subjects read clearly at small size. Good for a “year together” card or a family card.
Cut out your photos for the collage →
Idea 3: The “us, somewhere else” card
Time: 15 minutes. Difficulty: medium. Best for: couples with a shared joke or a place they love.
Cut yourselves out of an ordinary photo and place yourselves somewhere you would rather be. Paris. A beach. The surface of the moon. It is funny, it is personal, and it works.
How to make it
- Take or find a photo of both of you. Standing, ideally, and lit from one clear direction.
- Use the background changer to drop in a new scene.
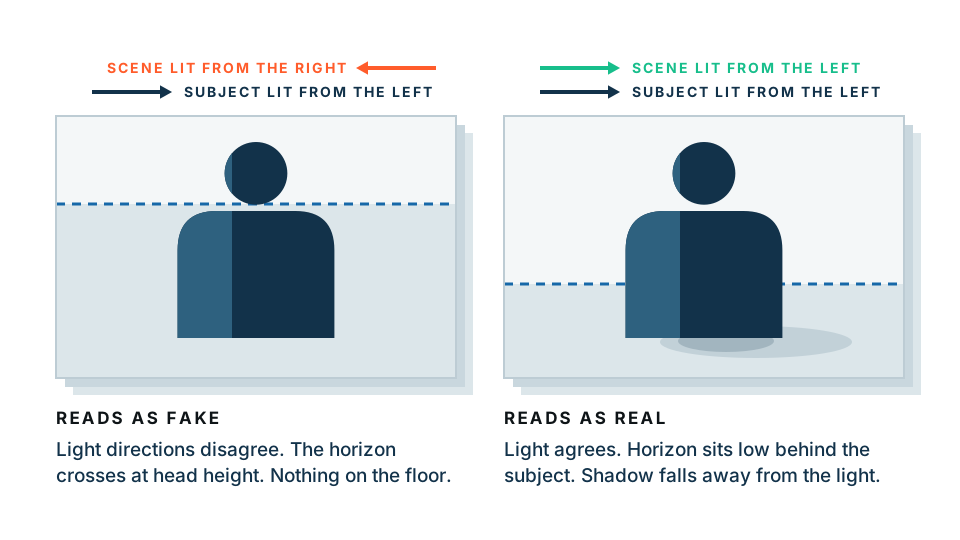
- Match the light. This is the one rule that makes or breaks it. If you were lit from the left, pick a background that is brighter on the left. Mismatched lighting is what makes composites look fake — far more than the quality of the cut.
- Match the scale. People should be the right size for the scene. Too big is comic; too small is confusing.
- Add the caption. “Next year.” “One day.” “Approximately as planned.”
Put yourselves somewhere better →
Idea 4: The pet as cupid card
Time: 15 minutes. Difficulty: easy. Best for: anyone with a pet, which is most people.
Your dog or cat, cut out, on a bright background, with paper wings and a small heart added. Absurd, and it always lands.
How to make it
- Photograph your pet in decent light, ideally from the side and at their eye level. Get down on the floor.
- Remove the background. Pets are the ideal test case for automatic tools — high contrast fur against a floor usually cuts beautifully.
- Place on a bright flat colour.
- Add simple shapes: two white wings behind, a small heart. Every design tool has these.
- Text: “Sent with love” over the pet’s name.
Getting a usable photo of a pet
Hold a treat just above the phone lens. Take twenty photos in burst mode. Keep one. This is the entire technique and it works every time.
Printing at home
| Setting | What to use |
|---|---|
| Paper | 200–300 gsm card, matte or silk |
| Size | A5 landscape, folded to A6 portrait |
| Resolution | 300 DPI — so 1748 × 2480 px for an A5 sheet |
| Print quality | Best or Photo, not Draft |
| Colour | Let the printer manage colour, not the app |
| Test | Print one on normal paper first, always |
If you do not have a printer, most photo-printing services accept an uploaded image and will post the card for you.
Sending it digitally
For a message or email, export as JPG at 1080 × 1350, under about 1 MB. Send it as an image rather than a PDF — it will display inline instead of needing a download.
If you want a bit of theatre, put the card image inside a plain email with one line of text and nothing else. Restraint reads as effort.
Start with the photo
Do not plan the design first. Find the photo you like, cut it out, and put it on a colour. The card usually designs itself from there.
Remove the background from your photo — free, nothing uploaded →
Frequently asked
What size should a Valentine's card be?
For print, A6 (105 by 148 mm) folded from A5, at 300 DPI. For a digital card, 1080 by 1350 pixels sends well on any messaging app. For an email, 1200 pixels wide.
Do I need design software to make a card?
No. A background remover for the photos and any free browser design tool for the layout is enough. All four ideas here work that way.
How do I get my photos to look like cutouts?
Remove the background and save as PNG. The subject can then sit on a colour or pattern with nothing behind it, which is what makes a card look designed rather than pasted together.
Can I print these at home?
Yes. Use the heaviest paper your printer accepts, around 200 to 300 gsm, and set the print quality to best. Print one test page before printing on the good card.
Is it safe to use personal photos in an online editor?
Our free background removal preview runs entirely in your browser, so personal photos are never uploaded. Check the privacy policy of any other tool you use.