General
Creative Ways to Use Background Removal in Everyday Life
Twelve practical, everyday uses for a background remover, from family photo gifts to school projects and marketplace listings, with steps for each.
Background removal has a reputation as a designer’s tool. It is not. It is closer to scissors: a simple way to take one thing out of a picture and put it somewhere better. Once you have used it a few times you start spotting jobs for it everywhere.
Here are twelve real uses, with just enough instruction to get each one done today.
Try the free background remover → Your photo is processed in your own browser for the preview, so nothing gets uploaded.
What do you actually need to get started?
Almost nothing:
- A photo where the subject is reasonably lit and reasonably in focus.
- A browser.
- Five minutes.
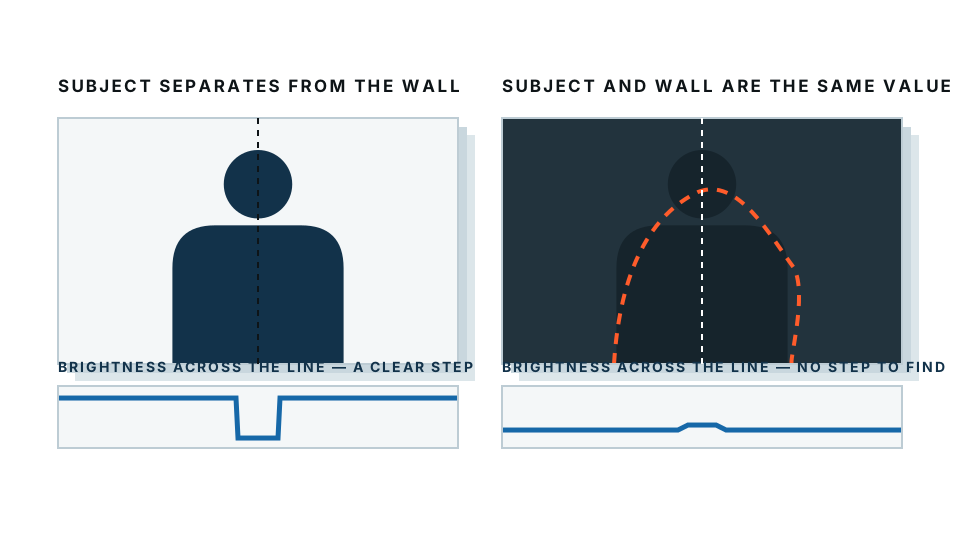
That is the whole list. The one thing worth caring about is the photo itself. A subject that stands clearly apart from what is behind it will cut out cleanly. A grey cat on a grey sofa will not. If a result looks rough, the fix is usually a better source photo, not a better tool.
Around the house
How can I make a photo gift without a design app?
Cut out the people, drop them onto a plain colour, and send it to a print service. This is the backbone of mugs, tote bags, fridge magnets and canvas prints.
- Pick a photo where the subject is head-to-toe or head-to-waist, with space around them.
- Remove the background.
- Save as PNG.
- Upload it to whatever printing site you use. Most of them let you place a transparent PNG on a coloured product.
The trick nobody mentions: leave a little breathing room. Print services crop, and a cutout that touches the edge of the canvas will get chopped.
How do I make custom stickers from my own photos?
Cutouts are stickers. That is all a sticker is — a shape with nothing behind it.
Remove the background from a photo of your dog, your child, or your car, save the PNG, and either send it to a sticker printer or import it into a messaging app that supports custom stickers. Round the corners of the subject mentally as you shoot: things with a clear silhouette make far better stickers than things with wispy edges.
Can I use it to tidy up family photos?
Yes, in two ways. You can cut a person out of a crowded holiday photo and place them on a clean background for a frame. Or you can remove a background that has gone yellow with age from a scan, keeping only the people.
Scan at 300 DPI minimum. Anything lower and the edges will look chewed.
For selling things
How do I make my marketplace listings look better?
This is the single highest-value use for most people. Listings with clean, consistent white backgrounds get more clicks and look more trustworthy, whether you are on eBay, Vinted, Facebook Marketplace or a local classifieds site.
- Photograph the item on any surface, in daylight, near a window.
- Run it through a white background maker.
- Download and upload to your listing.
You do not need a lightbox. You need a window and a tool that removes the messy kitchen table behind your item.
Put your listings on a clean white background →
Can I build a simple product catalogue this way?
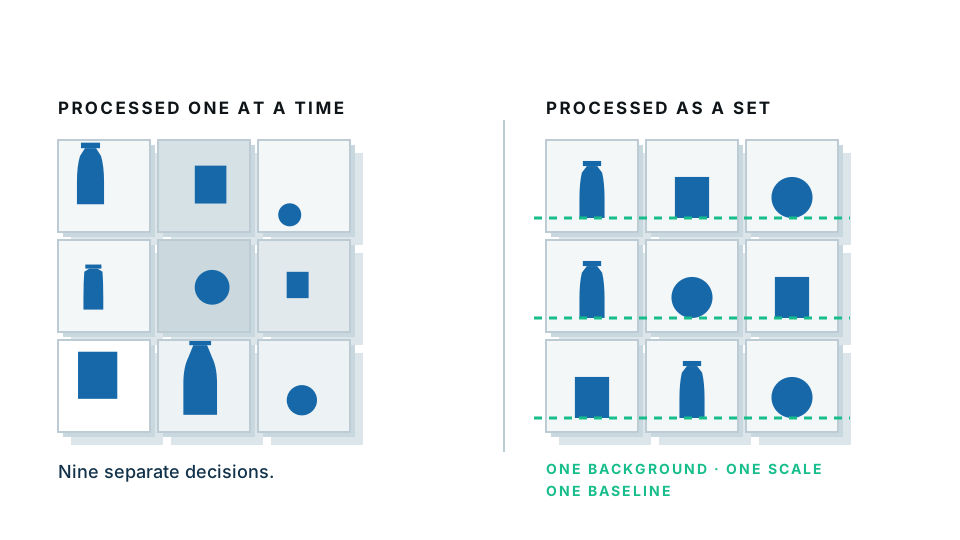
If you sell more than a handful of things, consistency matters more than perfection. Shoot every item the same distance from the camera, remove every background, and place every cutout on the same white. Suddenly a pile of phone snaps looks like a catalogue.
For work and school
How do I make a decent profile picture from a normal photo?
Take a photo of yourself against any wall. Remove the background. Add a plain, mid-tone colour behind you — soft grey or muted blue works for almost everyone. Crop square, with your eyes about a third of the way down.
That is a usable LinkedIn or Slack picture, made in about two minutes, and it will look better than a cropped wedding photo.
Can I use cutouts in slides and documents?
Constantly. A transparent PNG sits on a slide without an ugly white box around it. Put a cutout product photo next to a bullet list, or a cut-out headshot on a title slide, and the deck immediately looks less like a template.
Both PowerPoint and Google Slides accept transparent PNGs directly. Just drag the file onto the slide.
What about school projects?
Cutouts are ideal for posters, timelines and digital collages. A child can build a solar system, a family tree or a history timeline by cutting subjects out of photos and arranging them. It is the digital version of scissors and glue, minus the mess.
If the project involves photos of children, use a tool that does not upload the image. Our free preview processes everything locally in the browser for exactly this reason.
For creative projects
How do I put myself somewhere else?
Change the background rather than deleting it. Cut yourself out of a photo taken in your living room and place yourself on a beach, in front of a bookshelf, or on a flat brand colour.
The one rule that makes this look believable: match the light. If you were lit from the left, pick a background that is brighter on the left. Mismatched lighting is what makes composites look fake, far more than the quality of the cut.
Swap the background on a photo →
Can I make a podcast cover or a thumbnail?
Yes, and cutouts are the reason good thumbnails read at tiny sizes. A person cut out and placed on a bold flat colour is legible at 100 pixels wide. A full photo is not.
What about invitations and cards?
Birthday invitations, save-the-dates, holiday cards. Cut out the people, put them on a colour or pattern, add text in any free design tool. This works better than using the original photo because you control the space the text sits in.
Can I remove a person or object I do not want in the shot?
Partly. Background removal keeps the main subject and drops everything else, which handles photobombers in the background well. Something standing right next to your subject is harder, and you will usually need a brush tool to clean it up manually.
A quick reference
| Job | Save as | The thing that matters most |
|---|---|---|
| Marketplace listing | JPG on white | Consistent crop and lighting |
| Sticker | PNG | A clear, simple silhouette |
| Slide or document | PNG | Transparency, not a white box |
| Profile picture | JPG | Plain mid-tone background |
| Photo gift or print | PNG, high resolution | Margin around the subject |
| Composite or scene swap | PNG | Matching light direction |
Start with one photo
Do not plan a project. Pick one photo that has been sitting on your phone and cut the background out of it. The whole thing takes less time than reading this sentence twice, and you will immediately think of the next five things to try.
Frequently asked
Do I need design skills to use a background remover?
No. Modern tools do the cutting for you. You upload a photo, the subject is separated from the background automatically, and you download the result. The skill is in choosing a good photo, not in editing it.
What file type should I save a cutout as?
PNG if you want the background to stay transparent so you can place the subject on something else. JPG if you have already added a new solid background and want a smaller file.
Can I remove the background from an old scanned photo?
Yes. Scan at 300 DPI or higher, then run the scan through a background remover. Old photos with soft edges may need a little manual brushwork around hair and fabric.
Is it safe to upload family photos to an online tool?
It depends on the tool. Our free preview runs entirely inside your browser, so the image never leaves your device. Check any tool's privacy policy before uploading photos of children or documents.
How many photos can I do at once?
One at a time is normal for free tools. If you have a folder of dozens, look for a batch mode so you are not repeating the same clicks.