Other software
How to Make a Background Transparent in Paint and Paint 3D
Step-by-step instructions for transparent backgrounds in Microsoft Paint and Paint 3D, including the trap that quietly turns your transparency white.
Paint is the tool that is already on the machine, which is why this question comes up so often. The honest answer has three parts: the new Paint can do it in one click, Paint 3D can do it with a couple of steps, and the old Paint cannot really do it at all.
This guide covers all three, plus the save setting that undoes everyone’s work at the last moment.
Quick summary: on Windows 11 with an updated Paint, use the Remove Background button and save as PNG. In Paint 3D, use Magic Select, then save as PNG with the Transparency toggle switched on. In classic Paint, transparency only works while pasting — the saved file will have a white background.
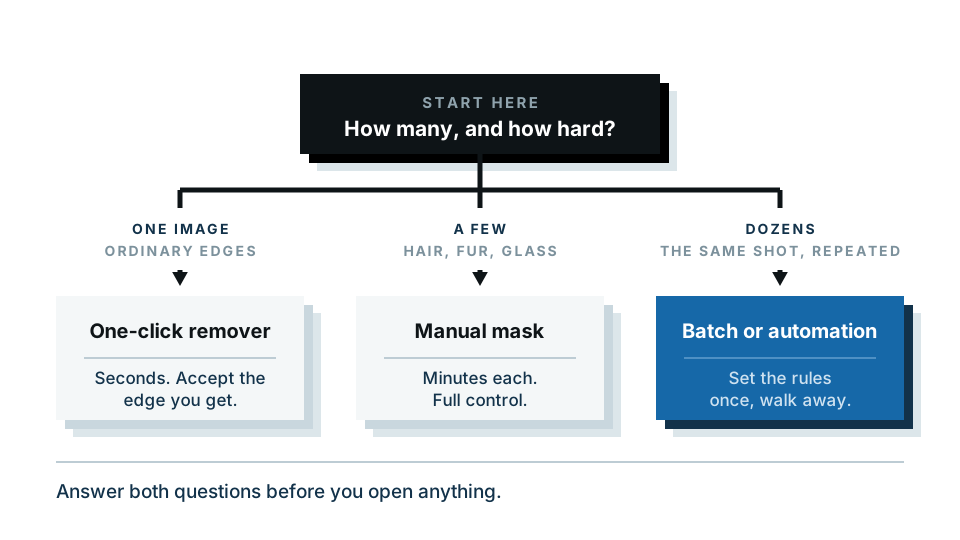
If you would rather skip the version archaeology, the background remover works in any browser on any machine, and its free preview processes your image locally without uploading it.
Which version of Paint do you have?
Open Paint and look at the toolbar.
- A “Remove background” button on the Image section of the ribbon — you have the updated Paint app on Windows 11. Best case.
- A rounded, colourful interface with a 3D shapes menu — that is Paint 3D.
- A plain ribbon with no Remove background button — classic Paint, or an older build.
To update: open Microsoft Store, go to Library, and check for updates to Paint.
Method 1: Paint on Windows 11 (the one-click way)
The updated Paint app added automatic background removal, and it is genuinely good.
- Open your image in Paint.
- On the Home tab, find the Image group.
- Click Remove background.
- The background disappears immediately and you see the checkerboard pattern behind your subject.
- If it took too much or too little, use Undo (Ctrl + Z) and select roughly around your subject first, then click Remove background again — it works within your selection.
- Go to File → Save as → PNG picture.
- Name the file and save.
That is the whole process. Two things worth checking before you save: zoom in on the edges (Ctrl + plus) and look at hair or thin details, and confirm you are saving as PNG, not JPEG.
Why PNG matters here
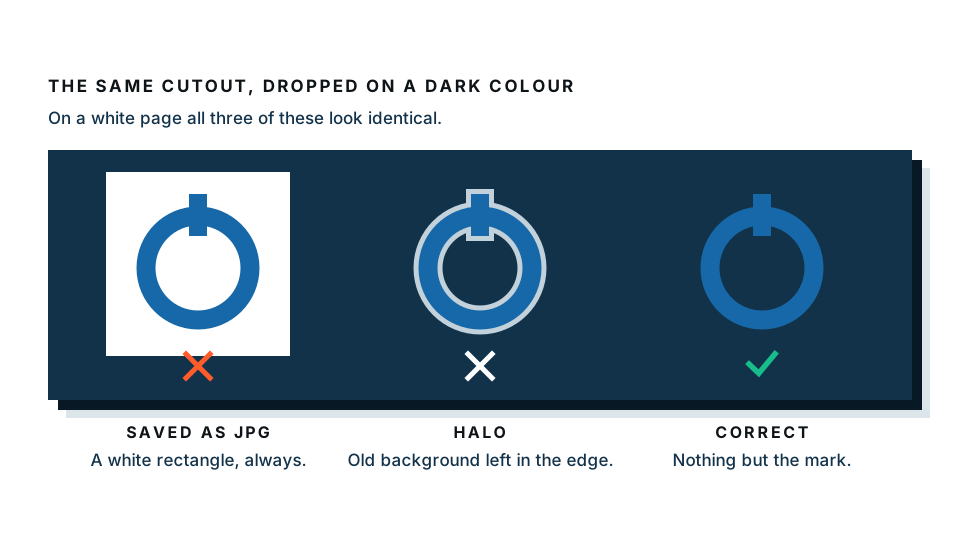
Transparency needs somewhere to be stored. PNG has an alpha channel — an extra value per pixel recording how see-through it is. JPEG does not, so it fills every transparent pixel with white on save. Your beautiful cutout becomes a cutout in a white box, and nothing about the editor warned you.
Method 2: Paint 3D with Magic Select
Paint 3D is no longer included with new Windows installs, but if it is already on your machine it still works well. Magic Select is a guided cutout — you draw a box, it guesses, you correct it.
- Open Paint 3D and open your image.
- Click Magic select in the top toolbar.
- Drag the handles of the box so it tightly surrounds the thing you want to keep. Click Next.
- Paint 3D shows its guess. Use Add to brush over parts it missed and Remove to brush off parts it wrongly included. Short strokes work better than long ones.
- Click Done. Your subject becomes a floating sticker.
- Press Ctrl + X to cut it, then Ctrl + A and Delete to clear the canvas.
- Press Ctrl + V to paste your subject back onto the now-empty canvas.
- Open Menu → Save as → Image.
- Set File type to PNG (image).
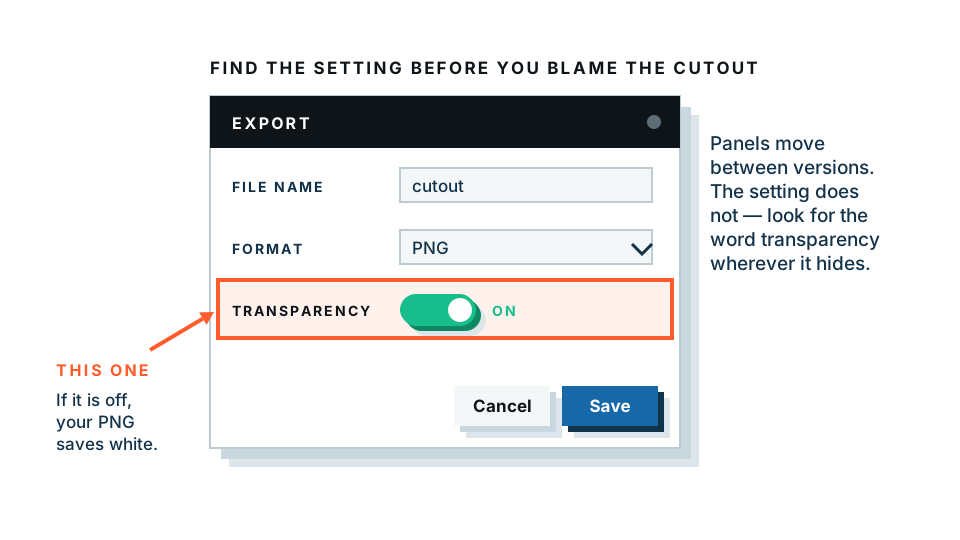
- Switch the Transparency toggle to On. This is the step everyone misses.
- Click Save.
Making the canvas transparent instead
There is an alternative route in Paint 3D that some people find easier:
- Click Canvas in the top toolbar.
- Switch Transparent canvas to On.
- Now delete or select-and-cut the background areas you do not want.
- Save as PNG with the Transparency toggle on.
This works well when the background is a simple shape you can select and delete.
Method 3: Classic Paint (and its limits)
Classic Paint has a Transparent selection option under the Select dropdown. It is worth understanding what it actually does, because the name is misleading.
Transparent selection makes your currently selected secondary colour transparent while you paste. So if your background is white and your secondary colour is white, you can select your subject, copy it, and paste it into another image without dragging the white along.
What it does not do is save a transparent file. Classic Paint saves PNG without an alpha channel. Open the result anywhere else and the background is white.
So classic Paint is fine for a quick composite inside Paint, and useless for producing a transparent PNG for a website, a slide or a logo. If that is what you are on, use one of the other options.
Stuck on an older Windows machine? The background remover runs in your browser, needs no install and no admin rights, and the free preview never uploads your image.
Comparison: what each version can do
| Classic Paint | Paint 3D | Paint (Windows 11) | |
|---|---|---|---|
| Automatic cutout | No | Magic Select, guided | Yes, one click |
| Edge refinement | No | Add/Remove brushes | Redo within a selection |
| Saves true transparency | No | Yes, toggle must be On | Yes |
| Still supplied by Microsoft | Superseded | No | Yes |
| Handles hair well | — | Fair | Fair |
Common problems, and what fixes them
I saved as PNG but the background is white. In Paint 3D, the Transparency toggle was Off. In classic Paint, it cannot do it — use another tool. In the new Paint, check you did not choose JPEG in the save dialog.
Remove background took part of my subject. Select roughly around your subject first, then click Remove background. It respects your selection and usually does better.
Magic Select keeps grabbing the wrong thing. Tighten the initial box. Magic Select works from that box, so a loose one gives it too much to guess about.
The edges look jagged. Paint’s tools produce a fairly hard edge. Slightly reducing the image size afterwards softens it, or use a tool with better edge handling.
There is a white outline around my cutout. Leftover background pixels in the edge. Neither Paint version has a shrink-selection control, so this one is hard to fix in Paint.
My file opens fine in Paint but has a white box in PowerPoint. You saved a JPG, or a PNG without transparency. Re-save following the steps above.
When to use something else
Paint is a reasonable choice when the image is simple, the machine is yours, and you only need one file. It has real limits:
- No batch processing. Twenty images means twenty rounds of clicking.
- Little edge control — no feathering, no shrinking, no refinement brush.
- Windows only. No help on a Mac, a Chromebook or a phone.
- Hair, fur and semi-transparent objects are consistently weak.
If any of those apply, a dedicated tool will save you time and produce a better edge. Try the background remover — it works on any device with a browser, the free preview runs entirely on your own machine so your image is never uploaded, and you can compare the edge quality against Paint’s result before deciding anything.
Quick checklist
- Check which Paint you have — the Remove background button is the tell.
- Do the cutout, then zoom to 100% and inspect the edges.
- Save as PNG, never JPEG.
- In Paint 3D, switch Transparency to On in the save panel.
- Test the file by dropping it onto a coloured slide. A white box means something above went wrong.
Frequently asked
Can Microsoft Paint make a background transparent?
Newer versions of Paint on Windows 11 have a Remove Background button that works in one click. Older versions of Paint cannot save transparency at all, only paste with it.
Why is my Paint 3D background still white?
You saved as PNG without switching Transparency on, or you saved as JPG. In Paint 3D use Menu, Save as, PNG image, then set the Transparency toggle to On before saving.
Is Paint 3D still available?
Microsoft removed Paint 3D from new Windows installs. If it is already on your machine it still works. If not, use the updated Paint app or a browser-based tool.
What is the transparent selection option in Paint for?
It makes the background colour transparent while you paste, so you can drop one cutout onto another image. It does not save transparency into the file.
How do I get a transparent background without installing anything?
Use a browser-based remover. Our free preview runs inside your browser, so nothing is uploaded, and it works the same on Windows, Mac and phones.