Other software
How to Make a Background Transparent in Google Slides
Google Slides has no true background remover. Here is what its transparency and masking tools really do, and the reliable way to get a clean cutout.
You dropped a logo onto a slide and it arrived inside a white box. Or a product photo that looks pasted on rather than placed. You want the background gone, and you want it gone in the next five minutes.
Here is the short, honest version:
- Google Slides has no true background-removal tool. Nothing in it will detect your subject and delete what is behind it.
- It does have three related tools that people mistake for one: a transparency slider, masking to a shape, and cropping.
- The transparency slider fades the whole image, which is almost never what you want.
- The reliable route is to make a transparent PNG outside Slides, then insert it. It takes about a minute and the result works everywhere else too.
Make a transparent PNG in your browser → The preview runs on your own machine, so an unreleased product shot never leaves your laptop.
What can Google Slides actually do to an image background?
Three things, and it is worth knowing exactly what each one is for before you go hunting through menus.
The transparency slider
Select an image, open the image formatting panel, and look for the adjustments group. There is a transparency control there. Drag it and the picture fades.
The important part: it fades everything equally. Your subject becomes just as see-through as the white box around it. This is a watermarking tool. It is genuinely good for putting a faint photo behind text, or ghosting a background image so a chart reads on top of it. It is not a cutout.
Masking to a shape
Select an image and use the mask option next to the crop control. You pick a shape — circle, rounded rectangle, arrow — and the picture is clipped to it. Everything outside the shape disappears.
This is real, useful transparency, but only along a geometric edge. It is perfect for round headshots in a team slide. It is useless for a person, a car, or a logo with an irregular outline, because your subject is not a circle.
Cropping
Straight rectangular trim. Handy for cutting dead space off the edge of a screenshot. It cannot follow a subject’s outline either.
Menu wording drifts. Google moves these controls between the toolbar, the right-hand panel and the Format menu, and the exact labels vary by version and by whether you are on the web or a tablet. Look for “Format options”, “Adjustments”, “Mask image” and “Crop image” as the concepts, not as exact strings.
Which option should you use?
| Option | What it actually does | When it works | Quality of result |
|---|---|---|---|
| Transparency slider | Fades the entire image uniformly, subject included | Ghosting a photo behind text or a chart; watermarks | Fine for its job, useless as a cutout |
| Mask to a shape | Clips the image to a circle, rounded box or other preset shape | Round headshots, framed thumbnails, decorative crops | Clean, but only along a geometric edge |
| Insert a ready-made transparent PNG | Places a real cutout with a genuinely see-through background | Logos, people, products — any irregular subject | The only route that gives a true cutout |
How do you get a real transparent background on a slide?
Prepare the image first, then insert it. Five steps.
- Find the best version of the image you have. A 300px logo pulled off a website will look ragged when you blow it up on a slide. Ask for the original file if you can get one.
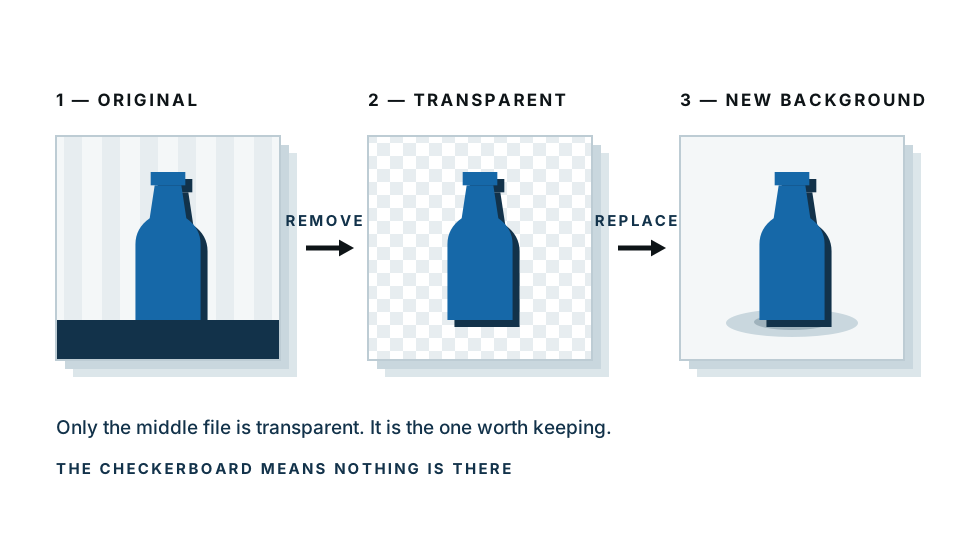
- Cut the subject out. Drop the image into a background remover and let it separate the subject from what is behind it. Check the edges — hair, glasses arms, thin table legs and anything close in tone to the background are the places where cutouts go wrong.
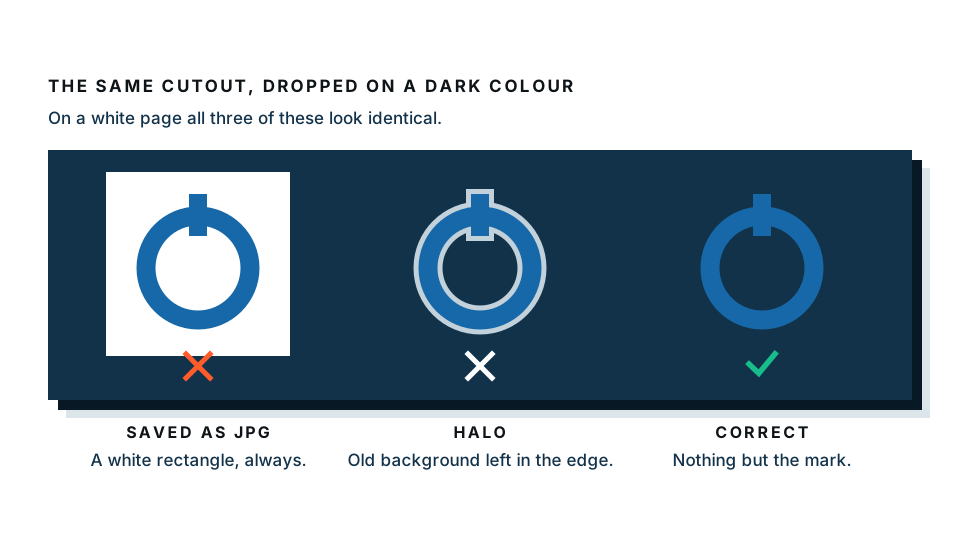
- Download it as a PNG. This matters. PNG can record which pixels are see-through; JPG cannot. Save the same cutout as a JPG and every transparent pixel comes back as solid white, and you are exactly where you started.
- Insert it into the slide. Use Insert, then Image, then upload from your computer. Drag the picture into place.
- Check it against your actual slide colour. A cutout that looks flawless on a white canvas can show a pale halo the moment you put it on a dark slide.
Because the free preview runs inside your browser, you can check whether a logo or a client photo cuts out cleanly before anything is uploaded anywhere. Cut out your image now →
What goes wrong, and how to fix it
JPG quietly destroys your transparency
This is the single most common failure. You do the cutout, hit save, and the file lands as a JPG because that was the default. JPG has no alpha channel — the hidden layer that records which pixels are see-through — so the software fills the empty area with white. If your “transparent” image has a white box, check the file extension first.
White fringing on dark slides
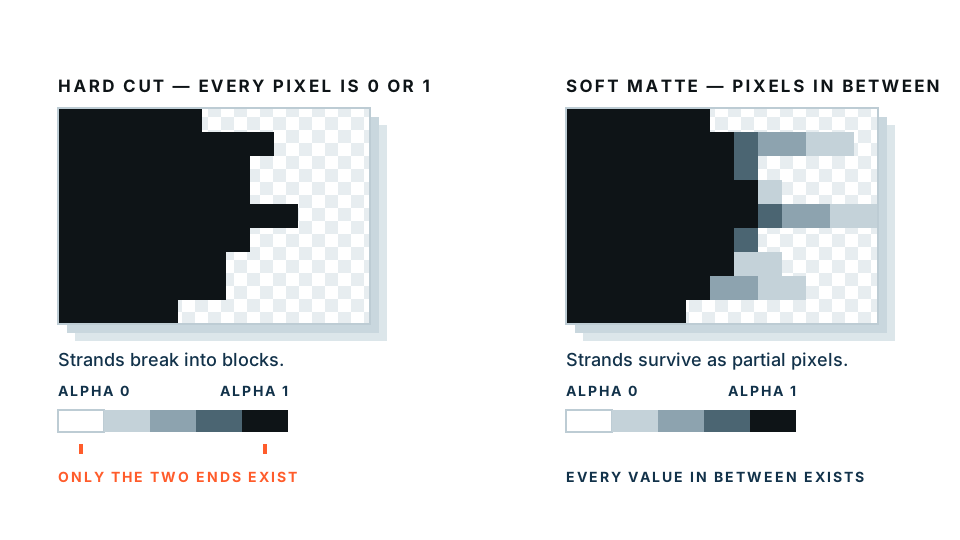
Put a cutout that came from a photo shot against a white studio wall onto a deep navy slide, and you may see a thin pale outline around the subject. Those are edge pixels that were part white and part subject, and they got kept.
Fixes, in order of how often they work:
- Redo the cutout from a larger, sharper source image. Most fringing is really a resolution problem.
- If your cutout tool has an edge or feather setting, tighten it a notch.
- As a last resort, place a soft shadow or a subtle darker shape behind the subject on the slide so the halo stops reading as an error.
The checkerboard pattern
Grey and white squares behind your image do not mean the image is broken. That is the universal convention for “nothing here”. It is drawn on screen only. When you present, download as PDF, or export to PowerPoint, the checkerboard is never included — the slide background shows through instead.
The image looks soft when projected
Slides get shown on large screens. Insert an image at roughly the size you intend to display it, or larger. Scaling a small PNG up is the fastest way to make a good cutout look cheap.
Does this work the same in PowerPoint and Keynote?
A transparent PNG is a transparent PNG. The same file behaves identically in PowerPoint, Keynote, Word, Google Docs, an email signature or a web page. That is the real argument for preparing the cutout once outside your presentation app: make the asset a single time and reuse it, instead of fighting a different set of image controls in every program.
A note on privacy
If you are cutting out a client’s logo, an unannounced product or a colleague’s headshot, it is worth knowing where the processing happens. Our free preview runs entirely in your browser — the image is never uploaded. The paid full-resolution download is processed on our server, and we say so plainly rather than pretending the whole product is offline.
The short version
Google Slides can fade an image and clip it to a shape. It cannot remove a background. If you need a logo or a person to sit cleanly on a slide, make the transparent PNG first, save it as a PNG and not a JPG, insert it, and check it against the real slide colour before you present.
Ready to sort it out? Make your transparent PNG here and drop it straight into your deck.
Frequently asked
Does Google Slides have a background remover?
No. Google Slides has an image transparency slider, image masking to a shape, and cropping, but none of them detect a subject and delete what is behind it. To get a real cutout you need to prepare a transparent PNG somewhere else and insert it.
Why does the transparency slider make my whole logo faded?
Because that is what it is designed to do. The slider applies one transparency value to every pixel in the image at once, so the subject fades along with the white box around it. It is a watermarking tool, not a cutout tool.
Can a JPG have a transparent background?
No. The JPG format has no way to record which pixels are see-through, so anything transparent gets filled in with white when you save. Always use PNG for cutouts.
Will the transparency survive when I download the slides as PDF or PowerPoint?
Yes, as long as the image itself is a PNG with real transparency. The checkerboard pattern you sometimes see is just how transparency is drawn on screen. It is never printed or exported.
My cutout has a white edge on a dark slide. How do I fix it?
That is fringing left over from the original cutout. Redo the cutout from the highest-quality version of the image you have, and if your tool offers an edge or feather control, tighten it slightly.