Other software
How to Remove the Background from a Picture in PowerPoint
Step-by-step instructions for PowerPoint's Remove Background and Set Transparent Color tools, what each is good at, and when to prepare a cutout first.
You have a headshot with an office wall behind it, or a product shot on a beige tabletop, and it needs to sit cleanly on your slide. Good news: unlike some presentation apps, PowerPoint genuinely does have background removal built in.
There are two separate tools and they are for different jobs:
- Remove Background — automatic subject detection with brushes to correct it. Use this for photographs.
- Set Transparent Color — deletes one exact colour across the whole image. Use this only for flat, single-colour backgrounds.
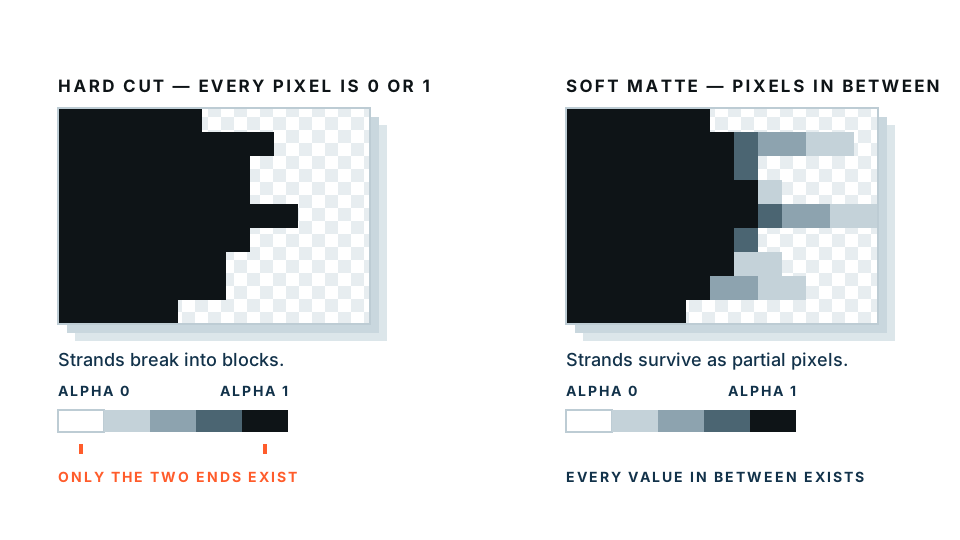
Neither is magic. Both struggle in the same places every cutting tool struggles: hair, fur, glass, motion blur, and any subject that is close in tone to what is behind it.
Need a clean cutout fast? Try the background remover → The free preview runs in your browser, so a colleague’s headshot never gets uploaded anywhere.
How do you use Remove Background in PowerPoint?
- Insert the picture and click it once so it is selected.
- Go to the Picture Format tab. This appears in the ribbon only while a picture is selected. Wording varies by version — older releases call it Picture Tools or Format.
- Click Remove Background. PowerPoint takes its best guess immediately. Everything it plans to delete is washed over in magenta. Everything left in normal colour is what it plans to keep.
- Drag the selection box if there is one, so it comfortably contains your subject. Give it a little breathing room rather than clipping tight.
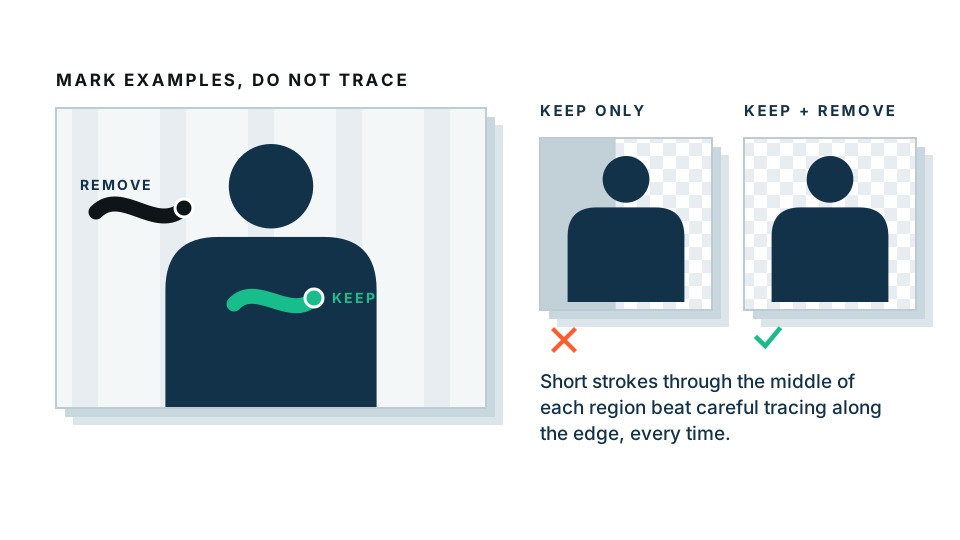
- Correct the guess with the two brushes. Mark Areas to Keep paints back parts it wrongly deleted — a hand, a shoulder, a bag strap. Mark Areas to Remove deletes parts it wrongly kept — a chair back, a slice of wall.
- Draw short strokes, not scribbles. One quick line through the middle of a region tells PowerPoint far more than a long squiggle across an edge. Add one stroke, look at what changes, add another.
- Click Keep Changes to accept, or Discard All Changes to start over.
The result stays editable. Select the picture again and click Remove Background to go back into the same session and adjust your marks.
Getting a better result
- Zoom in before you judge it. At slide size everything looks fine. At 200% you will see whether the edge is clean.
- Fix the biggest wrong region first. One stroke on a large mistaken area often corrects several small ones nearby.
- If the hair is a mess, stop. Edge detection on fine strands is the hardest case there is, and more brush strokes will not fix it. Prepare the cutout elsewhere.
How do you use Set Transparent Color?
This is the older, blunter tool. It picks one colour and makes every pixel of that exact colour see-through.
- Select the picture.
- On the Picture Format tab, open Color (sometimes labelled Recolor).
- Choose Set Transparent Color at the bottom of the menu.
- Your cursor becomes an eyedropper. Click the background colour you want gone.
Done — the whole image is preserved except that one colour value.
When it works: a scanned logo on flat white, a simple icon, a chart exported with a solid background, clip art. Anywhere the background is genuinely one uniform colour.
When it fails: photographs, almost always. A white studio wall in a photo is not one white. It is hundreds of near-whites with shadow and vignetting, so removing the shade you clicked leaves the rest as a patchy halo. It also cuts with a hard edge and no softening, so curves come out visibly jagged.
One more catch: if your background colour also appears inside your subject, that part goes see-through too. Click white on a person in a white shirt and you punch a hole through the shirt.
Which approach should you choose?
| Approach | What it does | Best for | Weak spots |
|---|---|---|---|
| Remove Background | Detects the subject automatically, with brushes to correct it | Photographs: headshots, products, objects on real backgrounds | Hair and fur, glass, blurred edges, subject close in tone to background |
| Set Transparent Color | Deletes every pixel of one exact colour | Flat single-colour backgrounds: scanned logos, icons, clip art | Useless on photos; hard jagged edges; punches holes in matching subject colours |
| Prepared transparent PNG | A real cutout made before you ever open PowerPoint | Anything that matters, or any image you will reuse | Needs one extra step up front |
Does this work everywhere PowerPoint runs?
Not quite, and this catches people out.
- Desktop PowerPoint on Windows and Mac has the full set — Remove Background with both brushes, and Set Transparent Color. Mac versions have historically lagged slightly on brush behaviour and menu placement.
- PowerPoint for the web is the limited one. Background removal is not reliably available there. If the button is missing, that is the reason — you have not broken anything.
- Mobile apps vary considerably by release.
Exact ribbon labels and menu positions drift between versions, so treat the names above as concepts to look for rather than exact strings to hunt.
If the tool is not available to you, the workaround is straightforward: make the cutout as a transparent PNG somewhere else and insert the finished image. That works in every edition of PowerPoint ever made, because inserting a picture is not a feature that can be missing.
Why prepare the cutout outside PowerPoint?
Three practical reasons.
It is reusable. A transparent PNG is a plain image file. The same cutout drops into Word, Google Docs, Keynote, your email signature, a social post and your website — unchanged, with no editing tools required at the far end. Do the work once instead of once per application.
The edges are better on hard subjects. Dedicated cutting tools are built for exactly one job. On hair, semi-transparent fabric and low-contrast edges they generally do better than a feature bundled into a presentation app. Neither is perfect — nothing is honest that claims to be — but the gap on hard cases is real.
Your file stays small and stable. A picture with PowerPoint background removal applied still contains the whole original image, hidden. That inflates the deck, and the original background is technically still in the file. If you cropped out something you would rather nobody saw, that matters. A prepared PNG contains only the cutout.
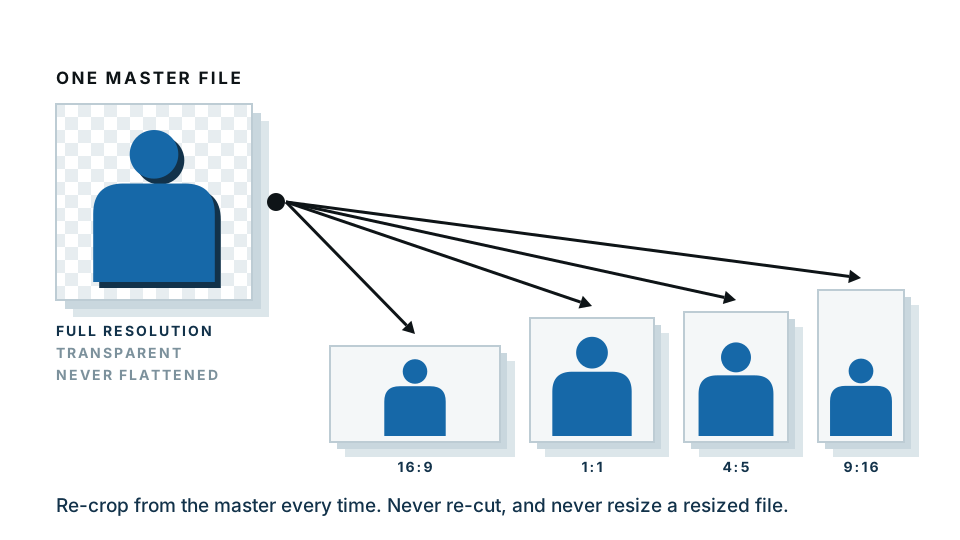
A quick middle path: make the transparent PNG here, then insert it into your slide like any normal image. On personal or client photos the free preview never leaves your browser; the paid full-resolution download is processed on our server, which we would rather state plainly than blur over.
Quick troubleshooting
The subject has chunks missing. Use Mark Areas to Keep with short strokes through the middle of the missing regions, not along their edges.
A white outline appears on a dark slide. Leftover edge pixels from the original background. Redo the cutout from a larger, sharper source image, or add a soft shadow behind the subject.
It went wrong after I resized it. Resizing only magnifies what was always there. Start from a bigger source image.
The removal disappeared. Compress Pictures and some file conversions discard the effect. Do the removal after any compression, or use a prepared PNG that has no effect to lose.
The short version
PowerPoint’s Remove Background is a genuinely capable tool for straightforward photographs, and Set Transparent Color still earns its place on flat-background logos. When a subject has fine detail, or when the same cutout needs to appear anywhere other than this one deck, prepare a transparent PNG first and insert it.
Start with the background remover → One clean file, usable everywhere.
Frequently asked
Where is Remove Background in PowerPoint?
Click the picture, then look on the Picture Format tab that appears in the ribbon. Remove Background sits at the far left of that tab. The exact tab name and position vary by version, and it is not available in every edition.
Why is Remove Background greyed out or missing?
Usually because you are in PowerPoint for the web, or the selected object is not a picture. The tool is a desktop feature. On the web you can insert an image that is already transparent instead.
What does the magenta overlay mean?
The pink or purple wash marks everything PowerPoint plans to delete. Anything left in normal colour is what it plans to keep. Use the two marking brushes to correct it before you accept the result.
Does Set Transparent Color work on photographs?
Rarely. It removes one exact colour value, and photo backgrounds contain hundreds of slightly different shades. It only works properly on flat, solid-colour backgrounds like a scanned logo.
Should I remove the background in PowerPoint or before I insert the image?
Do it beforehand if the image matters or you will use it more than once. A transparent PNG made outside PowerPoint drops into Word, Google Docs, email and your website unchanged.