General
How to Remove People — or Objects — From Photos
Clear a photobomber, a bin or a stray car out of your photo. Three methods that work, when to cut out instead of erase, and how to avoid a smudged mess.
The photo is good apart from one thing: a stranger in the corner, a wheelie bin, a parked car, a plug socket behind someone’s head. This guide covers how to get rid of it — and, more usefully, how to tell which of two very different approaches your photo needs.
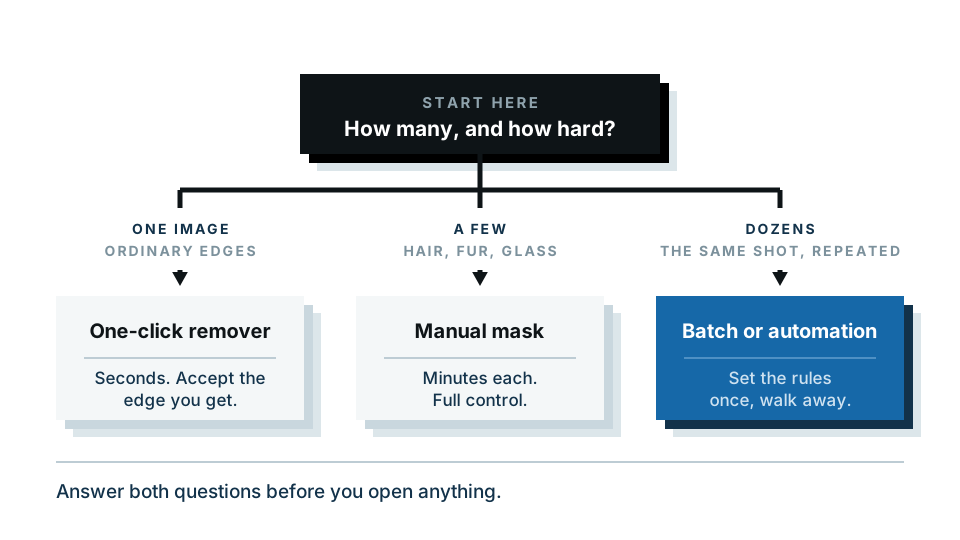
Quick summary: if the thing you want gone is behind your subject, remove the whole background instead of retouching. It is faster and the result is cleaner. Only reach for an erase tool when the object is on the same plane as something you must keep.
If your photobomber is in the background, you can be done in about ten seconds. Open the background remover and drop the photo in — the preview runs in your browser, so nothing is uploaded.
First, decide which problem you have
Almost every “remove this thing” job falls into one of three buckets. Pick yours before opening any tool.
| Where the object is | Best approach | Difficulty |
|---|---|---|
| Behind your subject | Remove the background entirely | Very easy |
| At the edge of the frame | Crop | Trivial |
| Beside your subject, same plane | Erase and fill | Moderate to hard |
| Overlapping your subject | Erase and fill, then hand-repair | Hard |
Most people default to the hardest method because “remove object” sounds like erasing. It usually is not.
Method 1: Remove the background (the underrated one)
If everything you want gone is behind the person or thing you are keeping, do not erase anything. Cut out what you want and discard the rest.
- Open your photo in a background remover.
- The tool detects your main subject and separates it from everything else.
- Check the preview. Look at hair, fingers, and anything held in the hand.
- Choose what goes behind: transparent, a solid colour, or a new photo.
- Download.
Everyone in the background disappears at once. No smudging, because nothing is being invented — your subject’s pixels are untouched and the background is simply replaced.
When does this work best?
- Tourist shots where the landmark is less important than the people you are with
- Portraits ruined by clutter — a doorway, a radiator, laundry
- Product photos taken on a messy table
- Any photo where the background does not need to survive
When does it not work?
When the background is the point. If you want to keep the beach and only remove one sunbather, this method removes the beach too. Go to method 3.
Method 2: Crop it out
Obvious, but skipped surprisingly often. If the unwanted person or object is near an edge, cropping is the only method that cannot go wrong — there is no invented pixel anywhere.
A few things worth knowing:
- Check your aspect ratio before cropping. If the image is going somewhere with a fixed shape — a shop listing, a profile photo, a slide — crop to that shape directly rather than cropping freely and squashing later.
- Rule of thirds still applies. Recompose deliberately rather than just shaving the edge off.
- Watch your resolution. A heavy crop of a phone photo can leave you short of pixels for print. Check the final pixel dimensions.
Method 3: Erase and fill
This is the real retouching job — you delete an area and the software invents plausible pixels to replace it. Modern versions of this are impressive but not magic.
On an iPhone
Recent iPhones running current iOS have a Clean Up tool in Photos.
- Open the photo and tap Edit.
- Tap Clean Up.
- Tap, brush over, or circle the object.
- It fills automatically. Tap Revert in the edit menu if you dislike the result.
On a Pixel or recent Android
Google’s Magic Eraser lives in Google Photos.
- Open the photo, tap Edit, then Tools.
- Tap Magic Eraser.
- It suggests people it detected in the background — tap Erase all, or circle things yourself.
- Tap Done.
On desktop
In Photoshop, the Remove Tool is the fastest route: brush over the object and release. Content-Aware Fill (Edit menu, after making a selection) gives you more control, including a panel where you choose which part of the image it samples from. The Clone Stamp is the manual fallback — Alt-click a clean source area, then paint.
In GIMP, the Heal Tool and Clone Tool do the equivalent work, entirely by hand.
Five rules that make fills look real
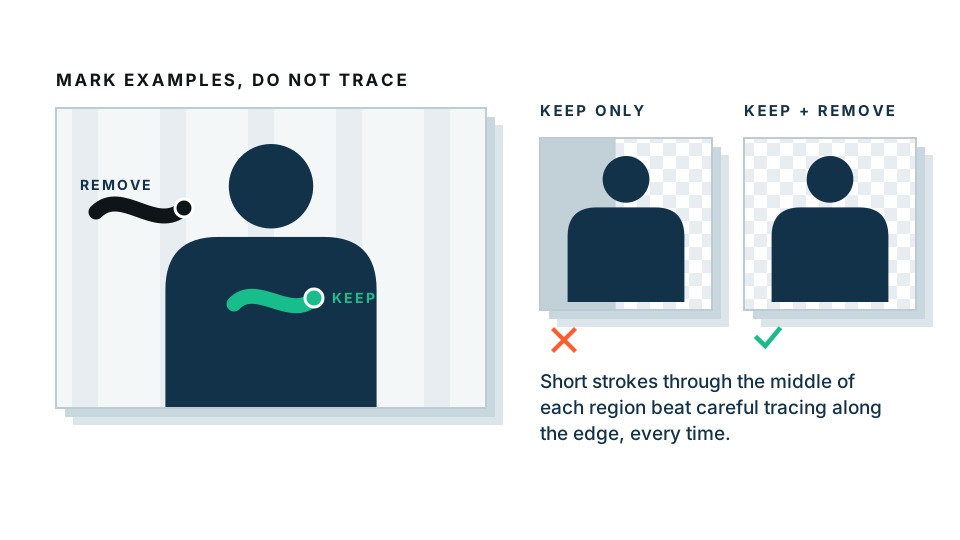
- Work small. Several short strokes beat one giant selection. The tool has more nearby material to copy from.
- Respect straight lines. Fill along a line — a skirting board, a horizon, a wall edge — in one stroke that follows it, not across it.
- Zoom out to judge. Fills that look wrong at 400% often read perfectly at normal size. Do not over-polish.
- Do the shadow too. People forget the shadow and leave a floating grey blob where someone stood.
- Know when to stop. If the fill has smeared three times, the area is too complex. Crop, or switch to method 1.
Struggling with a fill that will not sit right? If the thing you are fighting is behind your subject anyway, cut the subject out instead and give yourself a clean background to work with.
Removing objects from product photos
This deserves its own note because the answer is almost always method 1.
Product photos usually have a hand, a stand, a cable or a bit of table in shot. The reflex is to erase them. The better move is to cut out the product and put it on a fresh white or transparent background — the props vanish with everything else, and you get a listing image that matches your other listings.
The exception is anything touching or overlapping the product: a price sticker, a reflection of the photographer, a support that runs behind the item. Those need erase-and-fill, or a reshoot.
Removing people from a scene you want to keep
The hardest case: a landmark, a landscape, an interior — where the background is exactly what you want and only the people are the problem.
Two approaches actually work.
The patient one: erase and fill in small sections, one person at a time, in a desktop editor. Give yourself twenty minutes for a busy scene.
The clever one: if you can go back and reshoot, take five to ten photos from a locked-off position over a few minutes. Load them as layers and use a median stack — most editors can average the stack, and anything that moved between frames simply disappears, because it is not present in most of the frames. This is how empty-street photos of busy places get made. It needs a tripod and a bit of patience, and the result is flawless.
Common problems and fixes
A ghost outline where the person was. The fill sampled from an area that included them. Undo, make a slightly larger selection, and try again.
The fill copied a face into the wall. Classic content-aware failure. Use the fill panel’s sampling area control, or clone stamp manually from a genuinely blank area.
The cutout lost a finger or a bag strap. Automatic subject detection can drop thin held objects. Zoom into the preview before downloading and check the extremities.
The person is only half-removed. You removed the figure but not the shadow, the reflection, or their hand on your subject’s shoulder. Look for all three.
Which one should you use, in one line each
- Behind your subject: remove the background. Fastest, cleanest.
- At the edge: crop.
- Small object, simple surroundings: phone cleanup tool.
- Complex surroundings, must keep the scene: desktop erase-and-fill, small strokes.
- A crowd you cannot beat: reshoot as a stack, or accept the crop.
Nine times out of ten the thing bothering you is in the background — which means you do not need a retouching skill at all. Try the background remover on the photo now. The preview is free, runs entirely on your device, and takes less time than reading this paragraph.
Frequently asked
How do I remove a person from a photo for free?
For a person at the edge of the frame, crop them out. For a person in the middle, either use a phone's built-in cleanup tool, or cut out your subject and place them on a clean background.
What is the difference between erasing an object and removing the background?
Erasing invents new pixels to fill the hole, which can look smudged. Removing the background keeps your subject perfectly and replaces everything else, so there is nothing to invent.
Can I remove someone standing behind my subject?
Yes, and this is the easiest case. Cut your subject out with a background remover, then put them on a plain colour or a new scene. The person behind them disappears with the rest of the background.
Why does the erased area look blurry or smeared?
Fill tools copy nearby pixels into the gap. If the surroundings are complex — brickwork, faces, straight lines — there is nothing sensible to copy, so it smears. Work in small strokes instead of one big selection.
Do I need Photoshop to remove objects from photos?
No. Recent iPhones and Android phones both have a built-in cleanup tool, and for anything behind your subject, a browser background remover solves it without any retouching at all.