Other software
How to Remove the Background in GIMP
Three reliable ways to cut out a background in GIMP — fuzzy select, the free select tool and layer masks — with exact menu paths and export settings.
GIMP is free, powerful and completely manual. There is no magic button — you pick a selection tool, tell GIMP what to keep, and clean up the edges yourself. Done well, the result is excellent. Done in a hurry, it looks cut out with scissors.
This guide covers the three methods worth knowing, when to use each, and the two settings that cause almost every “why is my background still white” problem.
Quick summary: add an alpha channel first, choose a selection method that matches your image, then export as PNG. Skip the alpha channel and nothing else will work.
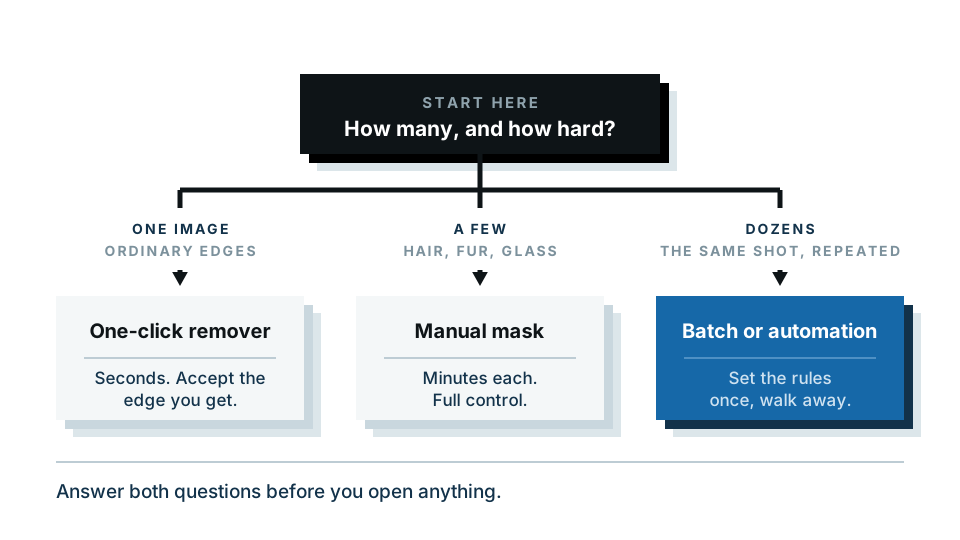
If you would rather not do any of this by hand, our background remover does the cutout automatically and the free preview runs entirely in your browser — your image is never uploaded. But GIMP is a genuinely good tool, so here is how to use it properly.
Before you start: add an alpha channel
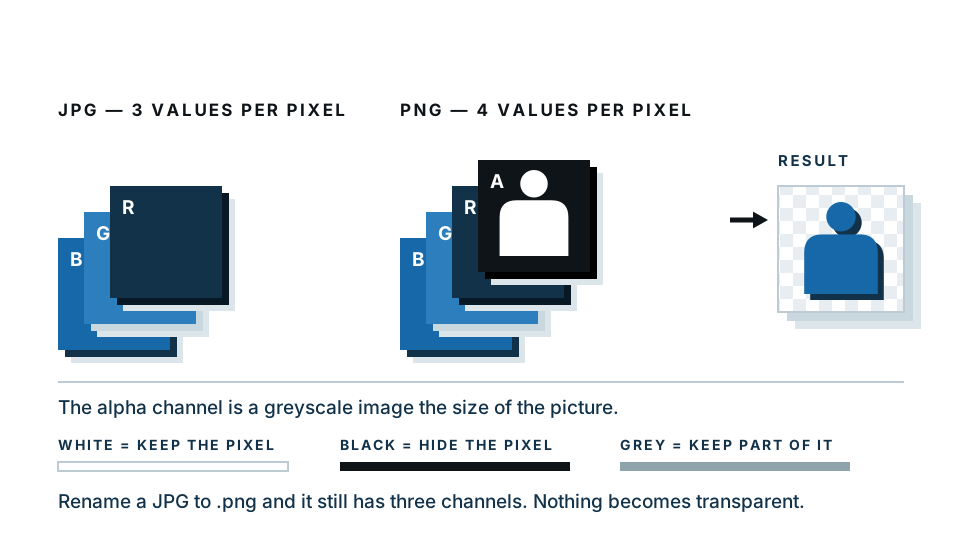
This is the step everyone misses. An alpha channel is the extra layer of information that lets a pixel be transparent rather than a colour. Without it, GIMP has nowhere to store “nothing is here”, so it fills deleted areas with your background colour — usually white.
- Open your image: File → Open.
- Go to Layer → Transparency → Add Alpha Channel.
- If the option is greyed out, you already have one. Good.
Now when you delete something, you will see a grey checkerboard. That checkerboard means true transparency.
Method 1: Fuzzy Select, for flat backgrounds
Use this when the background is one fairly even colour — a studio backdrop, a white product shot, a plain wall.
- Press U or pick the Fuzzy Select tool (the magic wand) from the toolbox.
- In the Tool Options panel, set Threshold to about 20 to start.
- Click once on the background. A dotted “marching ants” outline appears.
- Look at what got selected. Too little? Raise the threshold. Bleeding into your subject? Lower it.
- Hold Shift and click to add more areas — the gap under an arm, the space inside a handle.
- Press Delete.
How do you soften the edge afterwards?
A raw fuzzy selection leaves a hard, slightly jagged edge. Fix it before deleting:
- Select → Feather, set 1 to 2 pixels. This blurs the selection boundary slightly.
- Select → Shrink, set 1 pixel. This pulls the selection in so you do not keep a halo of old background colour.
Do shrink first, then feather. One pixel each is usually enough at web sizes; go to 2 or 3 on very large images.
What is the threshold slider actually doing?
Threshold controls how different a colour can be from the pixel you clicked and still count as “the same”. Low threshold means only near-identical pixels get selected. High threshold means GIMP grabs a wider range — helpful on a gradient sky, dangerous when your subject shares a colour with the background.
Method 2: Free Select, for busy backgrounds with hard edges
When the background has too much going on for the wand, draw the outline yourself. It is slower but completely predictable.
- Press F for the Free Select tool (lasso).
- Click once at a corner of your subject to drop an anchor point.
- Keep clicking around the outline. Each click adds a straight segment.
- For curves, click and drag — GIMP draws a curved segment.
- Click back on your first point to close the shape, then press Enter.
- That selects your subject. Invert it with Select → Invert so the background is selected instead.
- Press Delete.
Tips that save real time: zoom in to 200% with + and use the scroll wheel to pan while you click. More anchor points on curves, fewer on straight edges. If you misclick, press Backspace to remove the last point.
For very precise work, the Paths tool (B) is the same idea with editable Bézier curves — you can drag any point afterwards rather than starting over. Convert your finished path to a selection with the button in the Paths dialog.
Halfway through outlining a complex subject and questioning your choices? That is the honest moment to try the automatic background remover — free preview, in your browser, no upload.
Method 3: Layer masks, for hair and soft edges
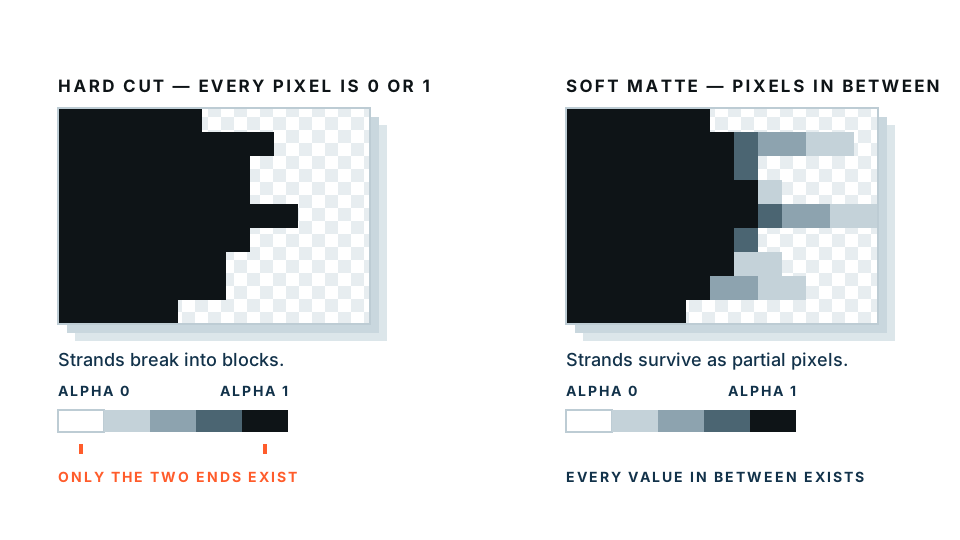
A layer mask is a black and white overlay attached to your layer. White means “show this pixel”, black means “hide it”, grey means partly transparent. Nothing is destroyed, so you can paint transparency in and out until it looks right.
- Right-click your layer in the Layers panel and choose Add Layer Mask.
- Choose White (full opacity) and click Add.
- Select the Paintbrush (P) and set your foreground colour to black.
- Paint over the background. It disappears.
- Painted too much? Switch foreground to white (press X) and paint it back.
- Use a soft-edged brush at low opacity around hair for a natural transition.
When you are happy, right-click the layer and choose Apply Layer Mask to bake it in.
The Foreground Select tool
GIMP also has a semi-automatic option that helps with hair. Pick Foreground Select from the Tools menu, roughly lasso around your subject, press Enter, then paint broad strokes over the parts that are definitely subject. GIMP works out the rest. Press Enter again to turn it into a selection. It is genuinely useful on a person against a contrasting background, and frustrating when the colours are close.
How do you export with transparency?
This trips people up because GIMP’s Save command does not do it.
- File → Save creates an .xcf file. That is GIMP’s own working format. It keeps your layers, but nothing else can open it.
- File → Export As creates the file you actually want.
To export a transparent image:
- File → Export As.
- Type a filename ending in .png — the extension sets the format.
- Click Export.
- In the PNG options, leave Save background colour unchecked and set compression around 9.
- Click Export again.
Exporting to .jpg will silently fill every transparent pixel with white. If your download looks fine in GIMP and wrong everywhere else, this is why.
Which method should you choose?
| Your image | Method | Time | Edge quality |
|---|---|---|---|
| Product on a white sweep | Fuzzy Select | 1–2 min | Very good |
| Object against a cluttered room | Free Select or Paths | 5–15 min | Excellent, if you are patient |
| Person with loose hair | Layer mask + Foreground Select | 10–30 min | Good, with practice |
| Fifty images for a shop listing | Not GIMP | — | — |
That last row is not a dig at GIMP. It is a file-by-file editor, and batch cutouts are simply not what it was built for.
Common GIMP problems, solved
Delete fills with white instead of transparency. No alpha channel. Layer → Transparency → Add Alpha Channel.
There is a faint coloured halo around my subject. The old background is still in the boundary pixels. Undo, then Select → Shrink by 1–2 pixels before deleting.
My selection is on the wrong layer. GIMP always acts on the highlighted layer in the Layers panel. Check it before pressing Delete.
The checkerboard shows in GIMP but the file has a white background. You exported as JPG. Re-export as PNG.
Nothing happens when I click. You may have an active selection elsewhere restricting the canvas. Press Ctrl + Shift + A to select none, then try again.
When GIMP is the right tool, and when it is not
GIMP is the right tool when you want total control, when the image is unusual, or when you are already comfortable with layers and masks. It costs nothing and the result can beat any automatic method on a difficult edge.
It is the wrong tool when you have a stack of images and a deadline, or when you only need one clean cutout and do not want to learn a selection workflow to get it.
For that second case, try the background remover. Drop your image in, see the cutout in a few seconds, and check the edges before you decide anything. The preview runs on your own machine — your photo is never uploaded — which is worth knowing whether the image is a client’s product or your own face.
Frequently asked
Does GIMP have a one-click background remover?
No. GIMP has no automatic subject detection. You choose a selection tool, refine the edges yourself, then delete or mask the background. Expect a few minutes per image.
Why is my GIMP background white instead of transparent?
Your layer has no alpha channel. Go to Layer, Transparency, Add Alpha Channel, then delete the background again. The checkerboard pattern confirms it worked.
Which file format keeps transparency in GIMP?
PNG and WebP keep transparency. JPG does not — exporting to JPG fills every transparent pixel with white. Use File, Export As and type a .png extension.
How do I remove a white background in GIMP quickly?
Add an alpha channel, pick the Fuzzy Select tool, click the white area, adjust the threshold until the selection hugs your subject, then press Delete.
Is GIMP good for removing backgrounds from hair?
It can be, but it takes work. Hair usually needs a layer mask painted by hand or the Foreground Select tool. An automatic remover handles fine strands in seconds.