Cars & dealerships
How to Best Take Car Photos & Remove the Background Afterward
Shoot a car properly with the camera you already own, then cut it out cleanly — including what to do about the shadow under the wheels.
Most bad car photos are not badly edited. They are badly taken — shot from standing height, in harsh sun, next to a skip.
The good news is that a car is a large, obliging subject. Get four or five things right at the camera and the editing afterwards becomes almost trivial. Get them wrong and no amount of editing rescues it.
This guide covers both halves: how to shoot, then how to cut out.
Want to see how your current photo holds up? Drop one into the background remover and see what the cutout looks like. It will show you immediately whether your shooting spot is the problem.
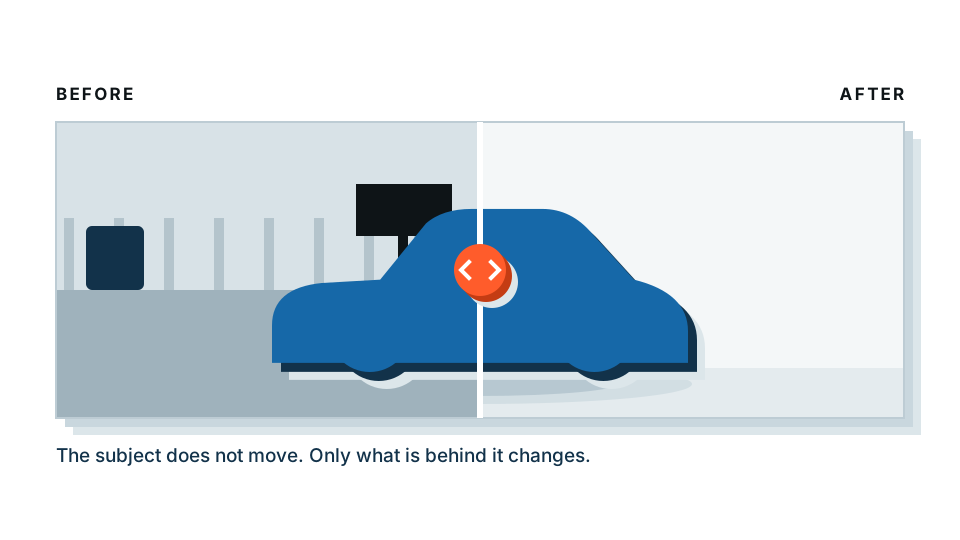
How do you take a good photo of a car?
Get low
This is the big one. Standing height puts the camera above the car’s beltline and makes the vehicle look short and dumpy. Crouch until the lens is roughly level with the headlights. The car instantly looks longer, lower and more expensive.
Stand back and zoom slightly
Phone lenses are wide, and wide lenses distort anything close to them. Shoot a car from two metres away and the nearest corner bulges out like a fish. Step back six or eight metres and zoom in a little. The proportions come out right.
Use the three-quarter angle
Position yourself so you can see the front and one side at the same time — roughly forty-five degrees off the nose. This is the shot people expect as the lead image, and it is the one that sells.
Turn the front wheels slightly towards you so the face of the alloy shows rather than its thin edge.
Choose flat light
Bright sunshine is the enemy. It blows out the bonnet into a white smear, drops hard black shadows down one flank, and throws reflections everywhere. An overcast day is a giant softbox for free. Failing that, the hour after sunrise or before sunset.
Choose an open location
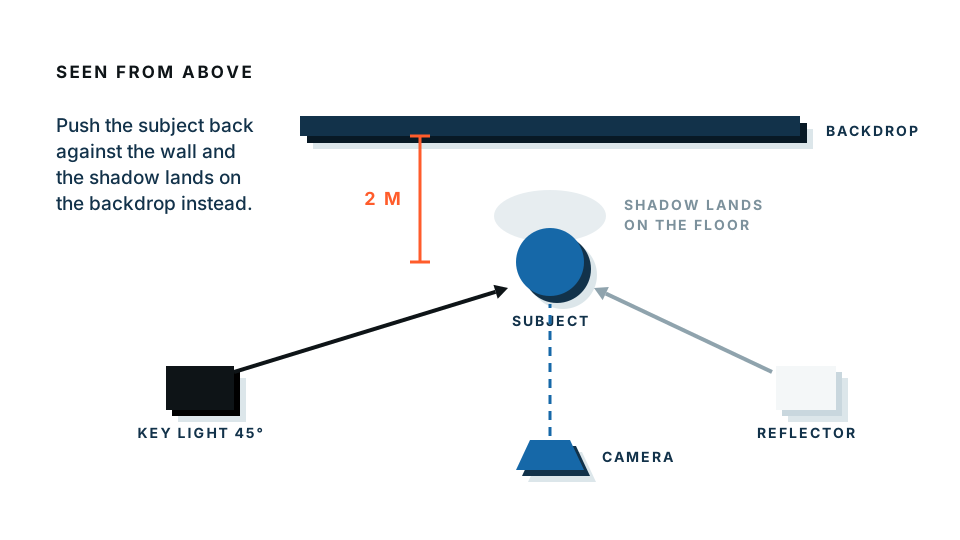
A car is a mirror on wheels. It reflects everything around it. Shoot in a car park surrounded by buildings and the bodywork reflects buildings. Shoot in an open space with sky above and nothing tall nearby and the panels reflect clean sky and clean ground.
Even if you are going to replace the background entirely, the reflections stay in the paint. Location is not something editing fixes.
Clean the car and the lens
Two seconds each, and they both show. A smeared phone lens produces a soft, hazy image that no sharpening recovers.
What shots should you take?
Work through the same list every time:
- Front three-quarter — the lead image
- Rear three-quarter
- Straight side profile, both sides
- Front interior and dashboard
- Dashboard with mileage visible
- Rear seats
- Boot space
- Wheels
- Any damage, honestly and clearly
The exterior shots are the ones that benefit from a background change. Interiors should be left exactly as they are.
How do you remove the background from a car photo?
- Edit the photo first. Straighten the horizon, fix the exposure, correct the colour so the paint looks like the paint. Do this before you cut anything out.
- Load your highest-resolution version. Not the one you already compressed and posted somewhere.
- Let the cutout run. A car has hard edges and strong contrast, so the body, glass and wheels come out well with no manual work.
- Check the wheel spokes. The gaps between alloy spokes are the fiddliest part of any vehicle cutout and the part buyers zoom into.
- Set the ground line above the shadow. More on this in a moment.
- Pick your background. Light grey is the safest default.
- Add a soft shadow under the car so it does not appear to float.
- Export at one fixed size and keep the untouched original.
Halfway there? Once the cutout looks right, the background changer is where you set the colour or scene behind it.
The shadow under the car — the honest explanation
Every guide that skips this leaves you confused on your first attempt, so here it is plainly.
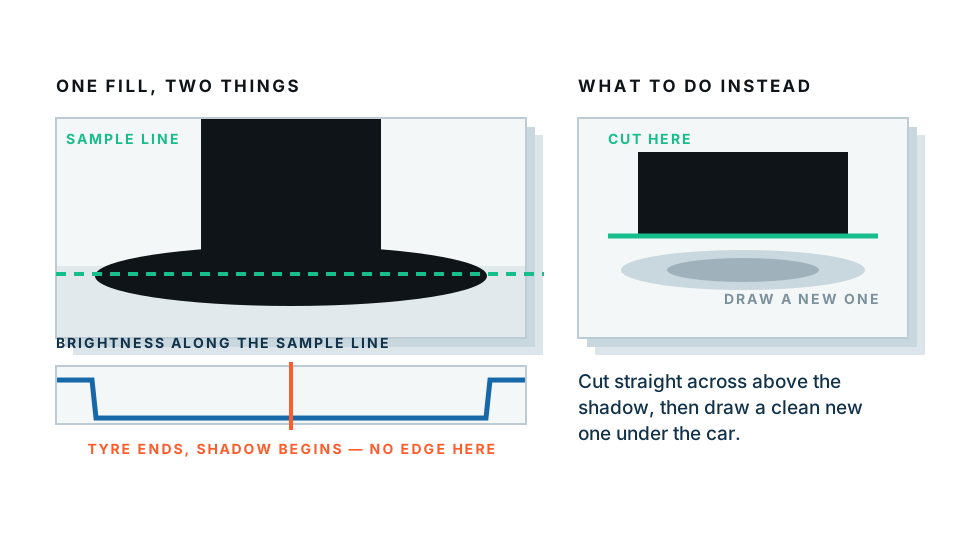
Photograph a car and sample the pixels where the tyre meets the ground. The rubber is near-black. The contact shadow is also near-black. In a normal photograph — particularly a phone photo, and particularly in bright or dull light — both have been crushed to the same value. There is no edge between them in the file.
An automatic cutout finds edges. If there is no edge, it cannot find one. So you get either a grey shadow smudge dragged along into your clean background, or a cut that eats the bottom of the tyres.
The fix professionals use:
- Run the cut line along the bottom of the tyres.
- Place a soft synthetic shadow — a slightly flattened, blurred ellipse — under the car in the new composition.
It looks better, and it is repeatable. If you are photographing more than one car, the synthetic shadow has a second advantage: it is identical every time, so a car shot in drizzle and a car shot in sun end up matching.
Which background should you choose?
| Option | Looks like | Good for | Watch out for |
|---|---|---|---|
| Light grey | Studio | The default for almost everything | Pick one grey and stick to it |
| Pure white | Catalogue | Marketplaces and comparison feeds | White and silver cars disappear |
| Soft gradient | Showroom | A hero image or a banner | Keep it subtle or it dates |
| Transparent PNG | Nothing | Placing the car on your own page or ad | Big files; not all marketplaces accept PNG |
| Replacement scene | Location shoot | Social posts | Very hard to match light direction believably |
If you are choosing under pressure, choose light grey. It flatters every paint colour and it never looks like a mistake.
What about the windows?
Car glass is partly transparent and partly reflective, which puts it in an awkward category. In practice, you almost never want a genuinely see-through window in a listing photo — a buyer does not want to see a hedge through the rear screen.
Keep the glass opaque. If one window has a distracting reflection in it, such as a person or a sign, deal with that single image by hand rather than changing your whole approach.
Common mistakes worth avoiding
- Shooting close with a wide phone lens. It distorts the nearest wheel arch dramatically.
- Shooting into the sun. The car goes dark, the sky blows out.
- Leaving the number plate visible when you did not intend to. Decide your policy and apply it to every image.
- Mixing backgrounds within one listing. Two grey and three white looks careless.
- Working from an already-compressed file. Each save degrades it further.
One thing about privacy
The free preview runs entirely inside your own browser — the image is not uploaded to generate it. That matters if the photo shows your driveway, your plate, or a car you have not listed yet. The paid full-resolution download is processed on our server, so that step does involve sending the file. Worth knowing before you start.
Put it together
Shoot low, shoot back, shoot in flat light, shoot somewhere open. Then cut above the shadow, add a clean one, and put the car on a grey that never changes.
Ready to do it properly? Start with the tools built for car dealerships and vehicle sellers and set your standard once.
Frequently asked
What is the best angle for a car photo?
A three-quarter view from the front, taken at about headlight height, with the front wheels turned slightly towards you. It shows the front and the side at once and it is what buyers expect to see first.
What time of day is best for photographing a car?
An overcast day, or the hour after sunrise and before sunset. Flat cloud gives you soft, even light with no blown-out highlights on the bonnet.
Can I take good car photos with a phone?
Yes. Angle, height and location matter far more than the camera. Crouch to headlight height, step back and zoom slightly instead of standing close, and shoot somewhere uncluttered.
Why does the shadow under the car cause problems?
The tyres and the shadow are usually the same near-black value in the photo, so there is no edge for a tool to find. Cut above the shadow and add a clean synthetic one instead.
Should I edit the photo before or after removing the background?
Fix exposure and colour first, then cut out. Editing a flattened cutout later means adjusting the new background at the same time, which is harder to control.