Cars & dealerships
Car Background Removal: A Practical Guide for Dealers and Sellers
How to remove the background from car photos cleanly, what to do about the shadow under the vehicle, and how to keep a whole listing looking consistent.
A car photographed on a busy forecourt tells a buyer two things at once: here is the car, and here is a wheelie bin, a puddle, half a competitor’s banner and someone’s legs. Removing the background gets rid of the second message.
This guide covers what actually happens when you cut a vehicle out of its surroundings, the one part of the job that is genuinely hard, and how to make a whole listing look like it came from one shoot instead of five different afternoons.
Start here: drop a car photo into the background remover and look at the result before you read any further. It takes a few seconds and it will make the rest of this make sense.
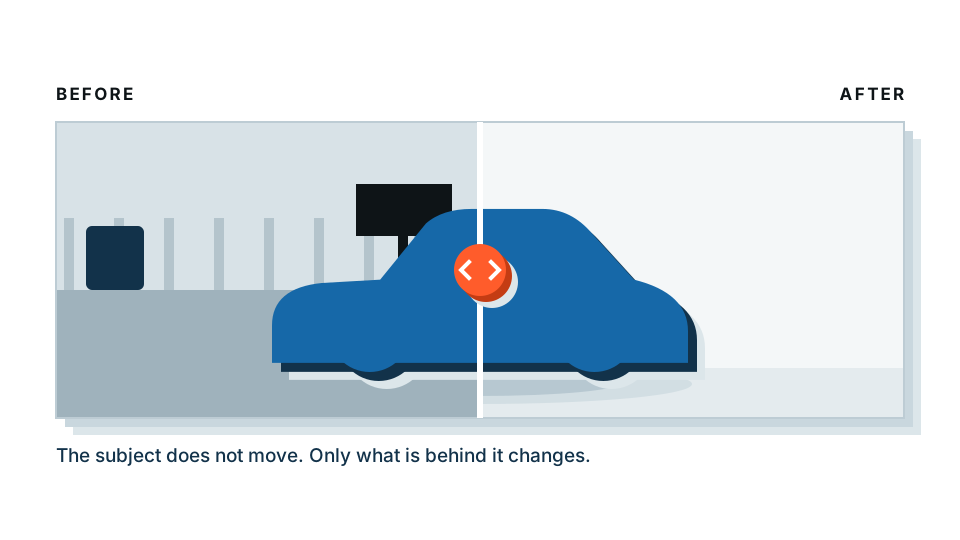
What does removing a car background actually involve?
Three things happen, and it helps to know which is which:
- The subject is found. The software works out which pixels belong to the vehicle and which belong to everything else.
- The edge is cut. Each pixel along the boundary is given a transparency value — fully visible, fully hidden, or partly both for the soft edges.
- A new background is put behind it. That might be a solid colour, a gradient, a showroom scene, or nothing at all if you want a transparent PNG.
Cars are, honestly, one of the easier subjects. A vehicle is a large object with hard, well-defined edges and strong contrast against most surroundings. There is no flyaway hair to deal with. The parts that need attention are the shadow, the glass and the wheel arches — and we will take each in turn.
Why can’t the shadow under the car be removed automatically?
This is the question every dealer runs into on their first batch, so here is the straight answer.
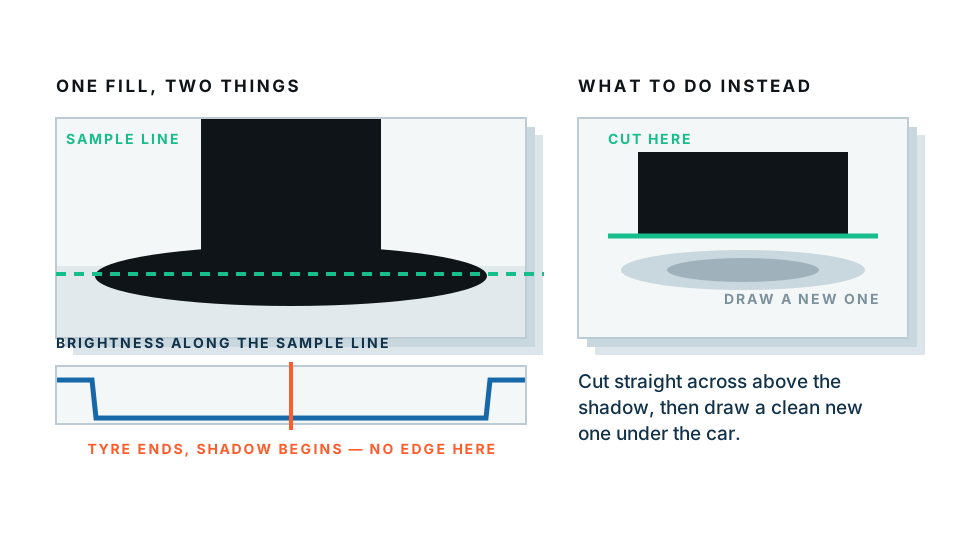
Look at a normal car photograph and sample the dark area where the tyre meets the tarmac. The tyre is near-black. The contact shadow under it is also near-black. In most photos — especially ones shot in bright sun or on a dull day with a phone — both have been crushed to the same value. They are, as far as the file is concerned, the same colour.
No tool can find an edge that does not exist in the data. So you get one of two outcomes: the shadow is kept and comes along as a grey smudge that looks wrong on a white background, or the shadow is cut and takes the bottom of the tyres with it.
The professional workflow is to cut above the shadow and add a clean synthetic shadow underneath. That means:
- The cutout line runs along the bottom of the tyres, not below them.
- A soft elliptical shadow is placed under the vehicle in the new composition.
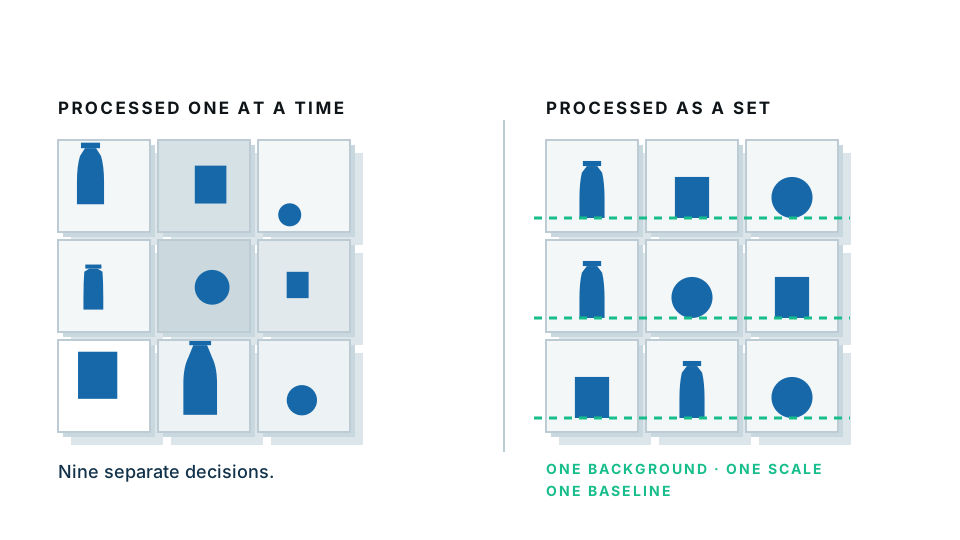
This is not a workaround. It is what high-end automotive retouchers do by hand, and there is a second reason it wins: a synthetic shadow is identical on every car in your listing. Real shadows vary with the weather, the time of day and where the car was parked. If you keep them, a set of thirty vehicles looks like thirty different shoots. If you replace them, it looks like a studio.
How do you remove a car background step by step?
- Pick your best original. Use the highest-resolution version you have. Never work from a photo you already compressed for a listing.
- Upload or drop the image in. The subject is detected automatically — you do not draw around anything.
- Check the three trouble spots. Look at the wheel arches, the gap between the wheel spokes, and the window glass. These are where a cutout most often needs a nudge.
- Choose the ground line. Confirm the cut runs along the base of the tyres rather than trying to preserve the real shadow.
- Set your background. A solid light grey or white for marketplace listings. A transparent PNG if the image will sit on a coloured page or a banner.
- Add a contact shadow. Without one, the car appears to hover. A soft, slightly flattened ellipse under the vehicle is all it takes.
- Export at your standard size. Decide this once and use it for everything.
If you are working through a batch of vehicles, do this once carefully on the first car and then repeat the same settings without deviating.
What about the glass, the chrome and the wheels?
Windows
Car glass is partly transparent and partly reflective, and what you can see through it is usually the ugly bit of the original background. Most dealers do not want a genuinely see-through window — a buyer looking at a listing expects to see the interior or a neutral dark tint, not a slice of the car park behind.
The practical answer: keep the glass opaque in the cutout. If a window has an obvious distracting reflection — a person, a sign, another car — it is worth a manual touch-up on that one image rather than a change to your whole process.
Chrome and paint reflections
A polished car is a mirror. It will reflect whatever it was parked next to, and cutting it out does not remove those reflections from the bodywork. This is why where you shoot matters more than how you edit. A car photographed in an open space with sky above and nothing tall nearby reflects sky and ground — which reads as clean. A car photographed between two vans reflects two vans.
Wheel spokes and arches
The small gaps between alloy spokes are the fiddliest part of any vehicle cutout. They are also the part buyers zoom in on. Check them at full size before you approve an image. If the spokes are dark against a dark background in the original, expect to spend a few seconds fixing them.
Mid-point check: if you have a photo open right now with a tricky set of alloys, put it through the background remover and zoom into the wheel. Better to know now than after you have processed 200 files.
Which background should you use?
| Background | Looks like | Best for | Watch out for |
|---|---|---|---|
| Plain white | Clean, catalogue | Marketplaces, feeds, comparison sites | White cars disappear into it — use very light grey instead |
| Light grey | Studio, premium | The safest all-round default for a dealership | Pick one grey and never change it mid-listing |
| Gradient | Showroom | Hero images, homepage banners | Can look dated if it is too strong |
| Transparent PNG | Nothing | Placing the car on your own page or ad design | Large file sizes; not accepted by every marketplace |
| Photographic scene | Location shoot | Social and lifestyle marketing | Very hard to make believable; light direction rarely matches |
If you are unsure, choose light grey. It flatters every paint colour, including white and silver, which are the two that vanish against a pure white background.
How do you keep a whole listing consistent?
This is the part that actually moves the needle, and it is a process problem rather than an editing problem.
- Fix the framing at the camera. Same distance, same height, same three-quarter angle for the lead shot on every vehicle. Consistent input makes consistent output almost free.
- Fix one output size. Pick a resolution and aspect ratio and use it for every image, every time.
- Fix one background. One colour. Written down. Not “whatever looks nice today”.
- Keep every original. When you change your standard in a year, you will want to reprocess, and you cannot reprocess a file you have already flattened onto a background.
- Do a quick QA pass. Look at the wheels and the ground line on each image at full size. It takes seconds and it catches almost everything.
One thing worth knowing about privacy
The free preview runs entirely inside your own browser. Your photo is not uploaded anywhere to produce it — which matters if you are working on stock that has not been announced yet, or images with a plate or a customer’s driveway in shot. The paid full-resolution download is processed on our server, so that step does involve a transfer. We would rather tell you that plainly than let you assume otherwise.
Get your listing looking like one shoot
Clean, consistent vehicle images are one of the few things a dealer controls completely, and buyers read them as a signal about how the business is run.
Ready to work through your backlog? Start with the tools built for car dealerships and set your standard on the first vehicle, so the next hundred take care of themselves.
Frequently asked
Can you remove the background from a car photo automatically?
Yes. The body, glass and wheels of a car are high-contrast shapes that automatic cutout handles well. The one part that usually needs a decision from you is the shadow on the ground under the vehicle.
Why does the shadow under the car get removed too?
In most photographs the dark tyres and the dark shadow beneath them are crushed to almost the same value. There is no edge in the image data to find, so no tool can reliably separate them. The professional fix is to cut above the shadow and add a clean synthetic one.
What background should a car listing use?
A plain light grey or white studio background is the safest choice. It looks clean on every marketplace, it does not date, and it makes a mixed-quality set of photos look like one consistent set.
Does removing the background damage the photo quality?
No. A cutout only changes which pixels are visible. Quality is set by your original photo, so shoot at the highest resolution your camera or phone offers and keep the untouched original.
How do I keep 200 car photos looking the same?
Decide one background colour, one output size and one framing rule before you start, then apply them to every image. Consistency across the listing does more for buyer trust than any single clever edit.