Cars & dealerships
Car Photography For Dealerships: How To Bulk-Edit Your Photos
A repeatable process for photographing and editing dealership stock, so a hundred vehicles look like one consistent shoot instead of a hundred shoots.
If you have forty cars on the forecourt and a phone full of photos taken over three different weeks, the problem is not that any single image is bad. The problem is that they do not match. One car is on wet tarmac, one has a van in the background, one was shot at golden hour and glows orange.
Buyers notice. Not consciously — they just get a vague sense that one dealer looks organised and another does not.
This guide is a process, not a tutorial. It is written for someone who has a backlog and no design background.
If you want to see the end result first: run one vehicle through the dealership tools and use it as the reference for everything below.
Why does consistency matter more than quality?
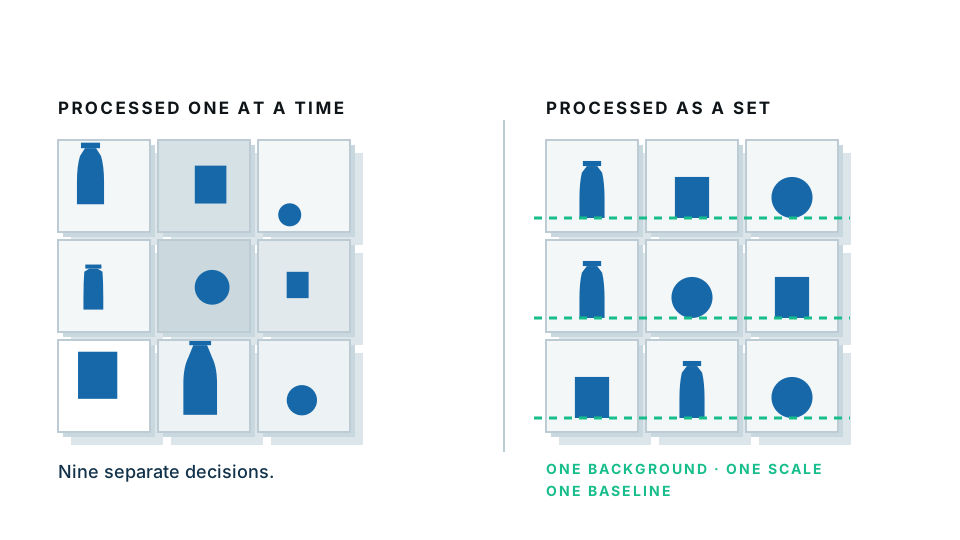
A single stunning photograph of one car does nothing for a listing page. A page of thirty vehicles that all sit on the same background, at the same size, at the same angle, does something quite specific: it makes the stock look comparable and the business look professional.
It also makes your work faster, because a fixed standard removes decisions. Every decision you make twice is time you are spending for no reason.
So the first job is not photography. It is writing down five things:
- The background colour you will use on every vehicle.
- The output size and aspect ratio.
- The angle and distance of the lead photo.
- The list of shots each vehicle needs, in order.
- The file naming convention.
Pin that to the wall. Everything else follows.
How should you shoot for easy editing?
The edit gets dramatically easier when the photo is shot with the edit in mind.
Shoot with space around the car
Leave room on all four sides. A car that touches the edge of the frame cannot be recomposed later, and a cutout that runs off the frame edge always looks amputated.
Get the camera down to headlight height
Phone photos taken at standing height look down on the car and make it squat. Crouch. It is the single biggest improvement most dealers can make in one afternoon.
Point the wheels
Turn the front wheels slightly towards the camera so you see the face of the alloy rather than its edge. It costs nothing and it is the difference between a photo that looks arranged and one that looks snapped.
Find one spot and always use it
Pick the least cluttered corner of the forecourt, ideally with open sky above and nothing tall nearby. A car is a mirror — it will reflect whatever surrounds it, and no amount of editing removes a van reflected in a door panel.
Shoot on an overcast day if you can choose
Flat cloud is free soft lighting. Bright sun creates hard reflections and blown-out highlights on bonnets that cannot be recovered.
The honest bit: the shadow under the car
You will hit this on your first batch, so here it is up front.
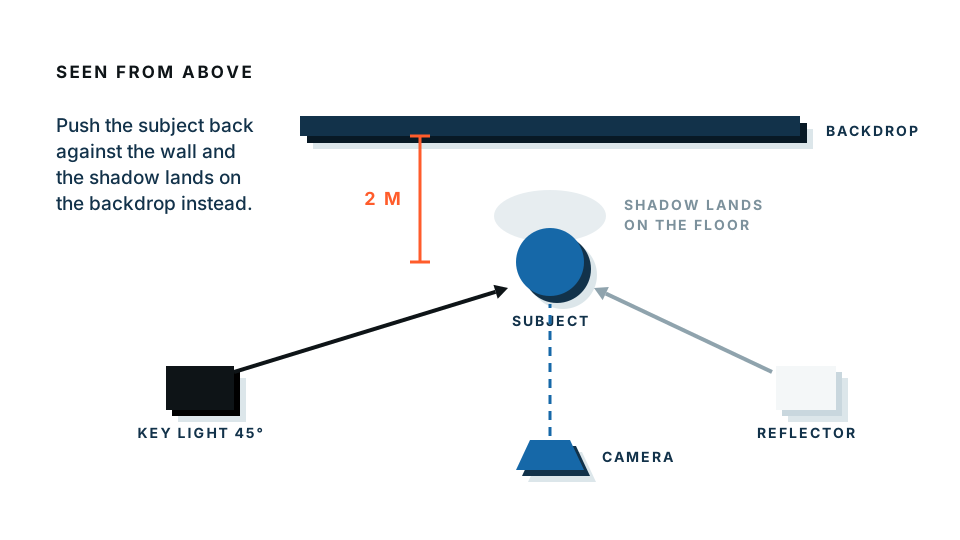
In almost every car photograph, the dark tyres and the dark contact shadow beneath them have been flattened to the same near-black value. There is no visible boundary between them in the image data, which means no automatic tool can reliably tell them apart. Anything that claims to separate a real cast shadow from the tyres on ordinary forecourt photos is overpromising.
The workflow that actually works — and that professional automotive retouchers have used for years — is:
- Cut along the bottom of the tyres, above the shadow.
- Add a soft synthetic shadow under the vehicle in the new composition.
The bonus is that a synthetic shadow is the same on every vehicle. Weather stops mattering. A car shot in drizzle and a car shot in sun end up looking like they were photographed in the same room five minutes apart. For a dealership, that is worth more than any single realistic shadow.
What does the bulk edit actually look like?
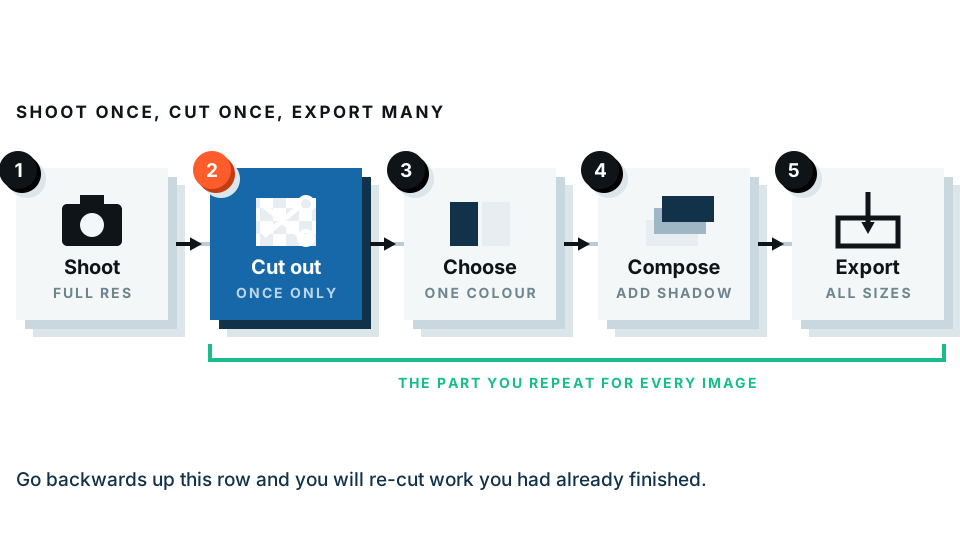
- Cull first. Delete the near-duplicates and the mistakes before you edit anything. Editing photos you will not publish is the most common wasted hour.
- Rename in a batch. Use
stock-number_shot-name.jpg— for exampleA4821_front-three-quarter.jpg. Your future self will thank you. - Process the lead image of the first car. Set your background, set your ground line, set your export size. This one image is your reference.
- Run the rest against that reference. Same background, same size, no exceptions, no “this one looks better on white”.
- QA at full size. Check the wheel spokes, the ground line and the wing mirrors. That is where problems hide.
- Archive the originals. Untouched, forever, in a folder you do not clean out. When you change your standard next year, you will want them.
Working through a batch right now? The background changer handles the cutout and sets the same backdrop on every file, which is the whole job in one pass.
Which shots does each vehicle need?
| Shot | Why it exists | Background treatment |
|---|---|---|
| Front three-quarter | The lead image; does the selling | Replaced, standard grey |
| Rear three-quarter | Shows the shape and the badge | Replaced, standard grey |
| Both side profiles | Shows the length and the panels | Replaced, standard grey |
| Front seats and dash | Condition and spec | Leave as shot |
| Rear seats | Space for families | Leave as shot |
| Dashboard with mileage | Trust signal | Leave as shot |
| Boot open | Practicality | Leave as shot |
| Wheels close up | Kerbing is a common complaint | Leave as shot |
| Any damage, honestly | Reduces disputes and returns | Leave as shot |
Only the exterior shots need background work. Interiors should be left alone — a replaced background inside a car looks bizarre, and buyers want to see the real thing.
How many can one person realistically do?
Honest numbers, assuming your standard is already fixed:
- Shooting: four to six vehicles an hour, including moving them.
- Culling and renaming: about a minute per vehicle.
- Background work: the four exterior shots take under a minute each once you are not making decisions.
Which means a person can take a car from forecourt to live listing in well under ten minutes. The backlog feels enormous because it is undecided, not because it is large. Fix the standard and it collapses.
A note on your images and privacy
The free preview runs entirely in your own browser — the photo is not uploaded to produce it. That is genuinely useful when a vehicle is a part-exchange that has not been prepped, or when a plate or a customer’s driveway is in shot. The paid full-resolution download is processed on our server, so that step does send the file. Worth knowing either way.
Start with one car
Do not start with the backlog. Start with one vehicle, get it exactly right, write down what you did, and then let that decision carry the next hundred.
Set your standard on the first car with the tools for car dealerships, and the rest of the forecourt becomes a queue rather than a project.
Frequently asked
How long should it take to photograph and edit one car?
Once your process is fixed, budget around five minutes of shooting and under a minute of editing per vehicle. The time sink is almost never the edit — it is deciding things again for every car.
How many photos does a used car listing need?
Most dealers land on eight to twelve: a three-quarter front, a three-quarter rear, both profiles, the interior front and rear, the dashboard with mileage, the boot, the wheels, and honest shots of any damage.
Can I edit car photos in bulk without design skills?
Yes. The skill is not in the editing, it is in writing down one standard — one background, one size, one framing — and then applying it without exception.
Should I keep the shadow under the car?
No. Real shadows vary with weather and parking spot, so keeping them makes a listing look inconsistent. Cut above the shadow and add a clean synthetic one instead.
What resolution should dealership photos be?
Shoot at the highest your camera allows and archive that original. Export listings at one fixed size that satisfies your busiest marketplace, and never re-edit an already-compressed file.