Cars & dealerships
How to Bulk-Edit Car Images with BackgroundBeGone
Turn a forecourt of car photos into consistent listing images, with a repeatable shoot setup, batch background removal and a naming system.
A forecourt of forty cars, eight photos each, is 320 images. Doing that one at a time in a photo editor is a week of someone’s life. Done properly it is an afternoon.
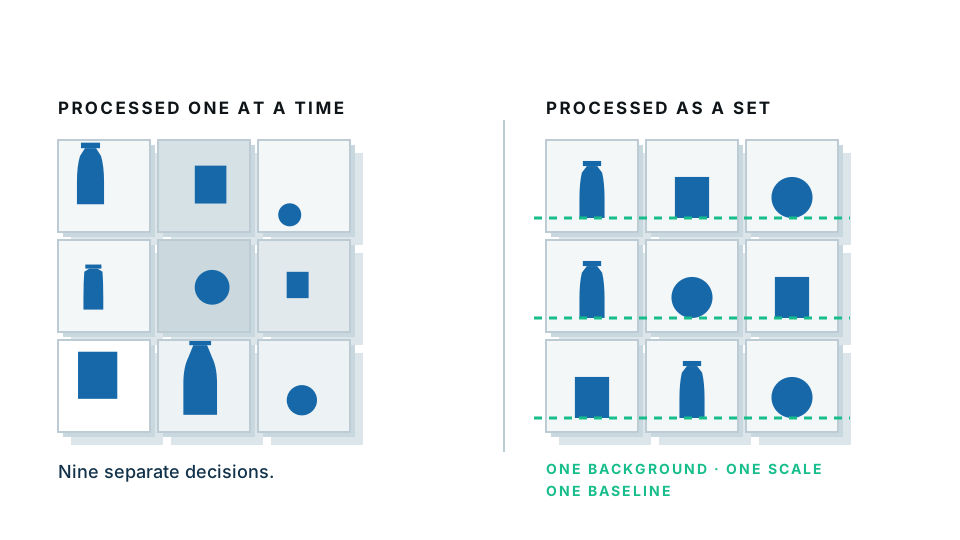
The trick is not the editing tool. It is making every photo identical before you edit anything, so the editing becomes mechanical.
Start with one car and see the output →
Why bulk-edit car photos at all?
Three concrete reasons.
Consistency sells. A search results page where every car sits on the same background reads as a professional dealer. Mixed backgrounds — some on the forecourt, some in a car park, one with a bin in shot — reads as a private seller with a lot of cars.
Distraction removal. Buyers should be looking at the car, not at the van behind it, the wet tarmac, or your competitor’s signage across the road.
Reusability. A car cut out onto transparency can be dropped into any background — white for a classified listing, a branded gradient for your own site, a showroom scene for a social post — without ever reshooting.
Part one: shoot for the batch, not for the photo
Everything downstream depends on this. Ten minutes of setup discipline saves hours of editing.
The conditions to shoot in
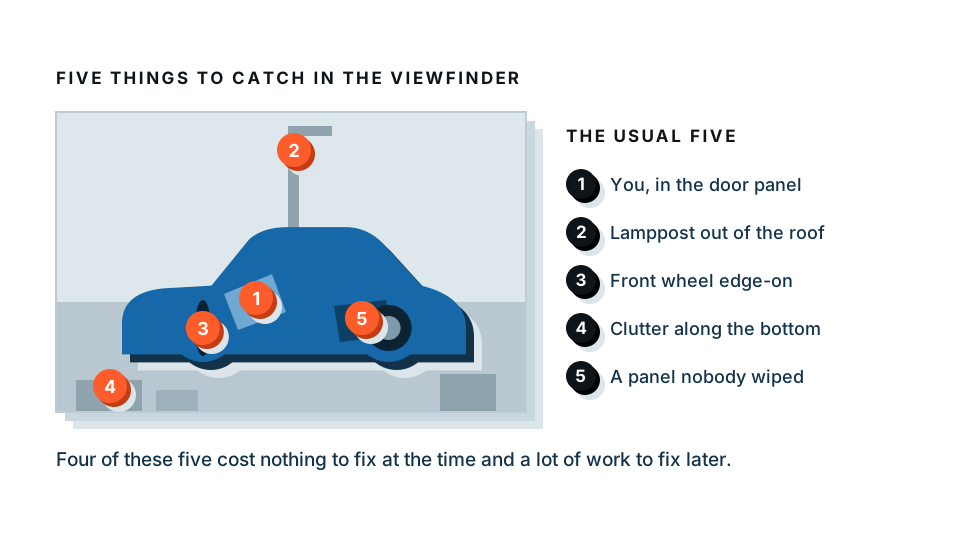
- Overcast days are ideal. Even light, no hard shadows, no blown highlights on paintwork.
- On a sunny day, shoot early or late. Midday sun creates reflections on every panel and a hard shadow under the car.
- Never shoot into the sun. The car becomes a silhouette and the cutout will be poor.
- Avoid wet ground if you can. Reflections confuse the cut and look messy.
The setup
- Pick one spot on your site with the plainest background available — a wall, a fence, an empty section of tarmac.
- Mark the car’s position with a chalk line or cones. Every car goes in the same place.
- Mark the photographer’s positions too. Eight marks on the ground for eight angles.
- Fix the camera height at roughly the car’s beltline — the line running along the base of the windows. This is the single most flattering height for a car and most people shoot too high.
- Wheels straight, or turned the same amount every time. Turn the front wheels slightly toward the camera so you see the face of the alloy rather than its edge.
- Clean the car. Zoomed listing photos show every water spot.
The eight-shot sequence
Same order, every car. Order is what makes it fast.
| # | Shot | Notes |
|---|---|---|
| 1 | Front three-quarter | The hero. Most listings lead with this |
| 2 | Side profile | Square on, wheels straight |
| 3 | Rear three-quarter | Balances shot 1 |
| 4 | Rear straight on | Shows badging and plate |
| 5 | Interior, front | From the rear door opening |
| 6 | Dashboard and mileage | Ignition on |
| 7 | Rear seats and boot | Space sells |
| 8 | Any damage or wear | Honest, close, clearly lit |
Shots 1 to 4 get background-removed. Shots 5 to 8 stay as they are — interiors do not need it, and buyers want them to look real.
Part two: name the files before you edit
The step everyone skips and everyone regrets.
Rename each car’s photos immediately after import, using a pattern that sorts correctly:
STOCK1234-01.jpg
STOCK1234-02.jpg
...
STOCK1234-08.jpg
Use the stock number or registration, and two digits for the sequence — 01 not 1, so alphabetical sorting matches shooting order. Most operating systems and photo apps can bulk-rename a selection in one action.
Do this first. Once 320 files are edited and shuffled, working out which anonymous cutout belongs to which car is genuinely painful.
Part three: remove the backgrounds
- Open the background remover.
- Drop in your exterior shots — the 01 to 04 files.
- Each car is separated from its surroundings automatically.
- Check three things on every image (see below).
- Download as PNG into a masters folder.
The free preview processes each image entirely inside your browser, so stock photography is not uploaded during that step. The paid full-resolution download is processed on our server — worth knowing if you have a policy about it.
The three things to check on every car
Windows. Glass is semi-transparent and it is the hardest part of a car to cut. Look for whether the original background is still visible through the side windows. If it is, brush it out — buyers notice a car with a hedge inside it.
Under the car. The shadow under the sills and between the wheels often gets kept as part of the subject. A dark blob under the car looks wrong on white.
Aerials and mirrors. Thin aerials and mirror stalks are the parts most likely to be cut away. Check them, and brush them back if needed.
Try it on your hardest car photo →
Part four: place them on a background
You have transparent PNGs. Now decide what goes behind them.
Option 1: white
Safest for classifieds and third-party listing sites. Clean, neutral, never wrong.
Use the white background maker to go straight from photo to white background in one step, skipping the transparent stage.
Option 2: a branded gradient
A soft vertical gradient in your dealership’s colours, with a subtle floor shadow beneath the car. This is what most manufacturer sites use, and it looks considerably more expensive than it is.
Build the gradient once at your listing dimensions, save it, and reuse it for every car.
Option 3: a showroom or scene
Use the background changer to place cars in a consistent environment. Effective for social posts and your own website.
One rule: match the light and the ground line. If the car was shot in flat overcast light, do not put it in a scene with hard afternoon sun. And make sure the horizon of the background sits behind the car’s wheels, not through them.
Add a ground shadow
A car cut out and placed on white with no shadow looks like it is levitating. Add a soft, wide, dark ellipse beneath it at low opacity, slightly wider than the wheelbase. This takes ten seconds and it is the difference between “cutout” and “photograph”.
Part five: crop and export consistently
- Same canvas for every image — 1600 × 1200 or 2048 × 1536 are safe.
- Same margin. Pick one, say 8% around the car, and apply it to every vehicle whether it is a hatchback or a van.
- Same horizon position if you are using a scene.
- Export JPG at quality 80, under about 500 KB for web listings.
- Keep the PNG masters in an archive folder, organised by stock number.
That archive is the asset. Rebrand, run a campaign, or move to a new listing platform, and you regenerate everything from the masters. No reshooting.
A realistic timetable for forty cars
| Stage | Time |
|---|---|
| Shoot 40 cars, 8 shots each | One day with two people |
| Import and bulk rename | 30 minutes |
| Background removal on 160 exteriors | 1–2 hours including checks |
| Crop, background, shadow, export | 1–2 hours |
| Upload | 1 hour |
Two days total, not two weeks. And the second time you do it, it is faster, because the ground marks are already there.
Start with one car
Photograph one vehicle properly using the sequence above, run the four exteriors through, and put them on white. Compare it to your current listings. That single comparison will tell you whether the whole process is worth rolling out.
Frequently asked
How long does it take to edit a car photo?
Around five seconds per image with automatic background removal, plus the time to crop. A forty-car batch with eight photos each is realistically an afternoon, not a week.
What background should car listings use?
A consistent one. Plain white or light grey is the safest choice for classifieds, and a branded gradient or showroom scene works well on your own site. What matters most is that every car uses the same one.
How do I keep my file names straight across hundreds of photos?
Rename by registration or stock number before you edit, not after. Use a pattern like STOCK1234-01.jpg through STOCK1234-08.jpg so the sort order matches the display order.
Do car windows cause problems for background removal?
Yes. Glass is semi-transparent, so tools often either keep the reflected background or cut through to nothing. Shoot with a plain surround and check the windows on every image.
Can I do this without uploading customer or stock photos?
Our free preview processes each image entirely in your browser, so nothing is uploaded during that step. The paid full-resolution download is processed on our server.