Cars & dealerships
How To Optimize Your Car Photos For Ads
Get car photos ready for classifieds and paid social: the lead image, aspect ratios, file size, plates, and why a clean background lifts click-through.
A car ad has about one second to work. Someone is scrolling a list of forty vehicles on a phone, and your listing is a thumbnail roughly the size of a postage stamp with a price under it.
Everything about optimizing car photos for ads follows from that. It is not about making one beautiful image. It is about making an image that survives being shrunk, recompressed and glanced at.
Quick start: take your current lead image and put it through the background remover. Then shrink it on screen until it is thumbnail-sized. If you cannot tell what the car is, you have found your problem.
What makes a good lead image?
The lead image is the ad. Everything after it is detail for people who already clicked.
A lead image that works has four properties:
- The whole car is in frame with a little space around it. Cropped bumpers read as careless.
- It is shot at headlight height, not standing height. Low makes the car look long and deliberate.
- It is a front three-quarter — front and one side visible at once.
- There is nothing competing with it. No bins, no signage, no other cars, no lamppost growing out of the roof.
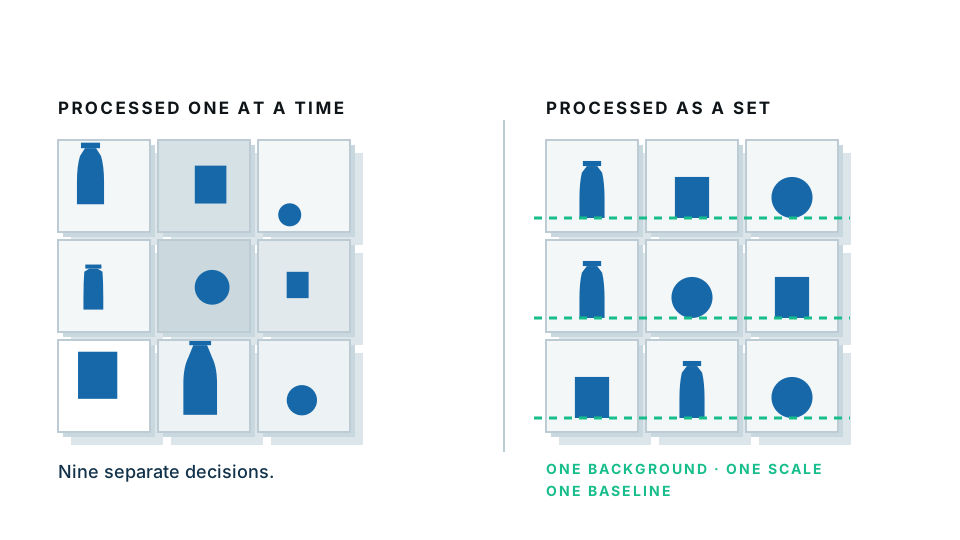
That last one is where background replacement earns its place. At thumbnail size, a busy forecourt is just visual noise. A car on flat light grey is a recognisable shape at any size.
How do you prepare the files?
Work in this order. Doing it out of order costs quality you cannot get back.
- Start from the original. The full-resolution file straight off the camera or phone. Never a file you have already exported and posted.
- Straighten and crop. Level the horizon. Crop to your standard aspect ratio, leaving margin around the vehicle.
- Correct exposure and colour. Make the paint the colour the paint is. Buyers complain when the car is a different shade in person.
- Remove the background. Clean neutral, same one every time.
- Add a soft contact shadow so the car sits on the ground instead of floating.
- Export once, at your standard size. Around 2000 pixels on the long edge covers almost every platform.
- Archive the untouched original somewhere you will not delete it.
Mid-point: the background changer is where steps four and five happen, and where you lock in the same backdrop across every vehicle.
What sizes and shapes do you need?
Different placements want different shapes, and cropping a landscape car photo to a square is where limbs get lost.
| Placement | Typical shape | What to watch |
|---|---|---|
| Classified listing thumbnail | 4:3 or 16:9 landscape | The car must read at postage-stamp size |
| Classified gallery | 4:3 landscape | Consistent framing across all images |
| Paid social feed | 1:1 square or 4:5 portrait | Landscape car in a square crop loses the ends — leave margin |
| Social story or reel | 9:16 vertical | Almost always needs a purpose-built crop |
| Your own website | Whatever you standardise on | Pick one and never mix |
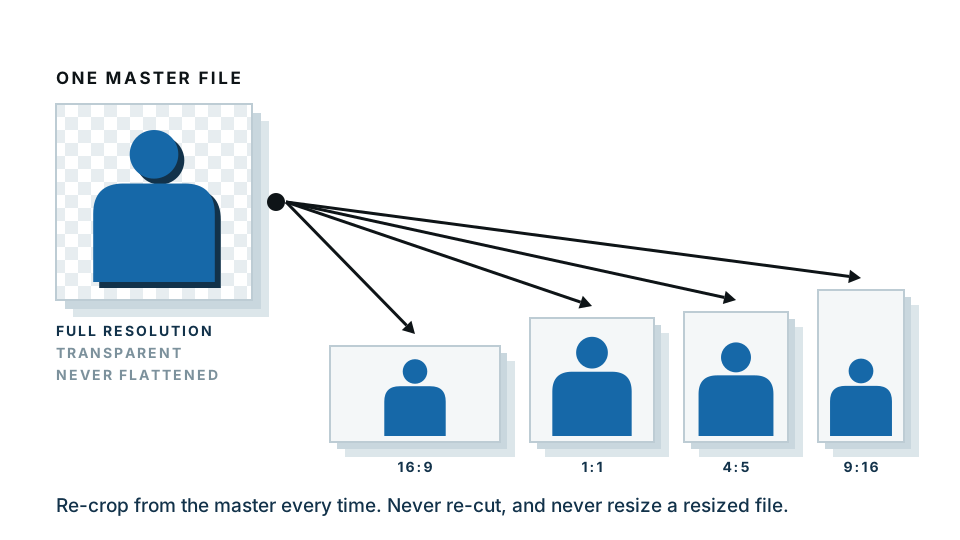
The practical trick: shoot and cut out with generous margin, then crop down for each shape from the same master file. A cutout on a plain background can be recomposed into any aspect ratio without reshooting, because you can simply extend the background. A photo of a car on a real forecourt cannot.
That is the single strongest operational argument for background replacement in advertising: one shoot, every format.
Why do photos look worse after you upload them?
Because every platform recompresses what you give it. You cannot switch that off. What you can do is give it a file that survives the process.
- Upload the right size, not a huge one. A 6000-pixel file gets crushed harder than a 2000-pixel one.
- Never upload an already-compressed file. Each save adds damage on top of the last.
- Prefer clean, flat areas. Heavy detail — gravel, foliage, chain-link fencing — is exactly what compression handles worst. A plain background compresses cleanly and leaves the compression budget for the car.
- Avoid heavy sharpening. It turns into visible crunch after recompression.
This is a quiet second benefit of a plain background. It is not just tidier; it genuinely holds up better through the platform’s compression.
What about number plates?
There is no single right answer, but there is a wrong approach: doing it differently on different cars.
Pick one policy and apply it everywhere:
- Show the plate. Some buyers use it to check history, which builds trust.
- Cover or remove it. Many traders do this to prevent plate cloning and misuse.
Whichever you choose, do it on every image of every vehicle, including the reflections in showroom windows and the plate visible in a wing mirror. Half-covered is worse than either option.
Which mistakes cost the most clicks?
- A dark, small, distant lead image. The car is unrecognisable in a feed.
- Mixed backgrounds across one listing. Two cars on white, three on tarmac, one in a garage. It reads as disorganised.
- Interiors used as the lead image. Nobody scrolls a list looking for dashboards.
- Portrait phone photos of a landscape object. Enormous empty sky and tarmac, tiny car.
- Text and price burned into the image. It dates instantly and many platforms penalise it.
- Too few photos. Under six and buyers assume you are hiding something.
The shadow question, answered honestly
You will notice this the first time you cut a car out. The dark tyres and the dark shadow underneath them are almost always the same near-black value in a photograph — they have been crushed together, so there is no edge in the file to separate them. No automatic tool can find a boundary that is not there.
The working answer, and the one professional retouchers have used for years, is to cut along the bottom of the tyres and add a clean synthetic shadow under the car afterwards.
For advertising specifically, this is not a compromise — it is an upgrade. A synthetic shadow is identical on every vehicle, so your whole inventory looks like one shoot rather than a scrapbook of different weather.
One thing about your files
The free preview runs entirely in your own browser, so the image is not uploaded to produce it. That is worth knowing if you are working on stock that is not live yet, or on photos with a plate or a private address in shot. The paid full-resolution download is processed on our server, so that step does involve sending the file.
Set it once, use it everywhere
Optimizing car photos for ads is mostly about deciding things once: one lead angle, one background, one export size, one plate policy. Then the next fifty vehicles cost you almost no thought at all.
Get your inventory looking like one shoot with the tools built for car dealerships — set the standard on the first car and the rest follow.
Frequently asked
What should the first photo in a car ad be?
A front three-quarter view of the whole vehicle, shot at headlight height, on a clean uncluttered background. It is the only image most people will see, so it has to carry the ad on its own.
What size should car photos be for an ad?
Export at one fixed size that satisfies your largest requirement, usually around 2000 pixels on the long edge. Let the platform downscale — never upscale a small file to meet a minimum.
Should I blur the number plate in a car ad?
Decide a policy and apply it to every image. Many traders remove or cover plates to prevent misuse. What matters most is consistency, not which choice you make.
Does a clean background actually improve results?
It removes competing detail from a thumbnail the size of a stamp, which makes the car easier to recognise at a glance. It also makes a whole listing look like one professional set.
Why do my car photos look worse after uploading?
Platforms recompress every upload. Give them a clean, correctly sized file to start with so their compression has less to damage, and never re-upload a file you have already compressed.