Product photography
Why AI-Generated Backgrounds Are the Future of Product Photos
AI backgrounds let one product photo become twenty scenes. Here is what they do well, where they still fail, and how to use them without wrecking trust.
For most of the last century, changing the background behind a product meant building a set. Renting a studio, hiring a stylist, buying props you use once. That cost is why small sellers ended up with one photo of each item on a kitchen worktop.
AI-generated backgrounds change the economics of that. One well-lit product shot becomes a marble counter, a sunlit café table, a moody slate surface and a seasonal scene — in minutes, for nearly nothing. This guide covers what the technology genuinely does well, where it still fails, and how to use it without producing images that erode a customer’s trust.
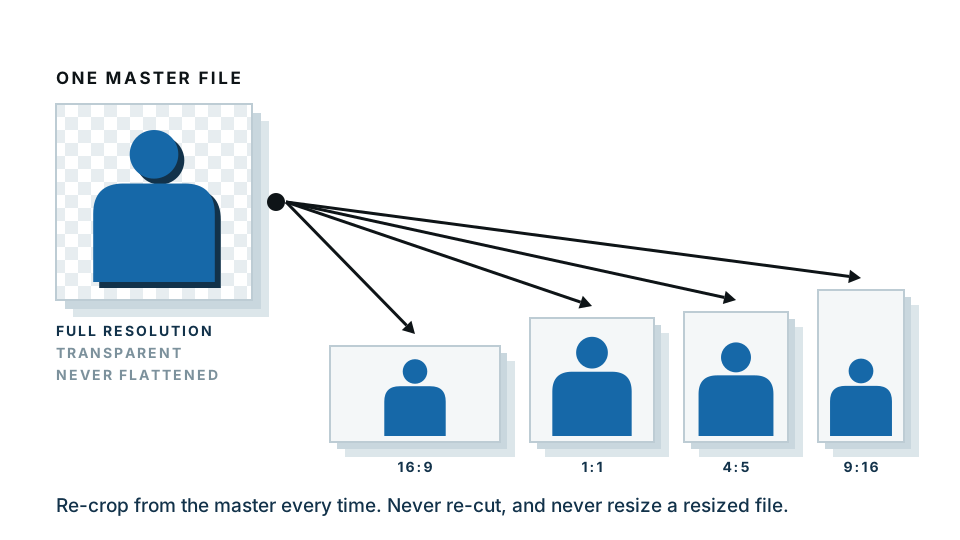
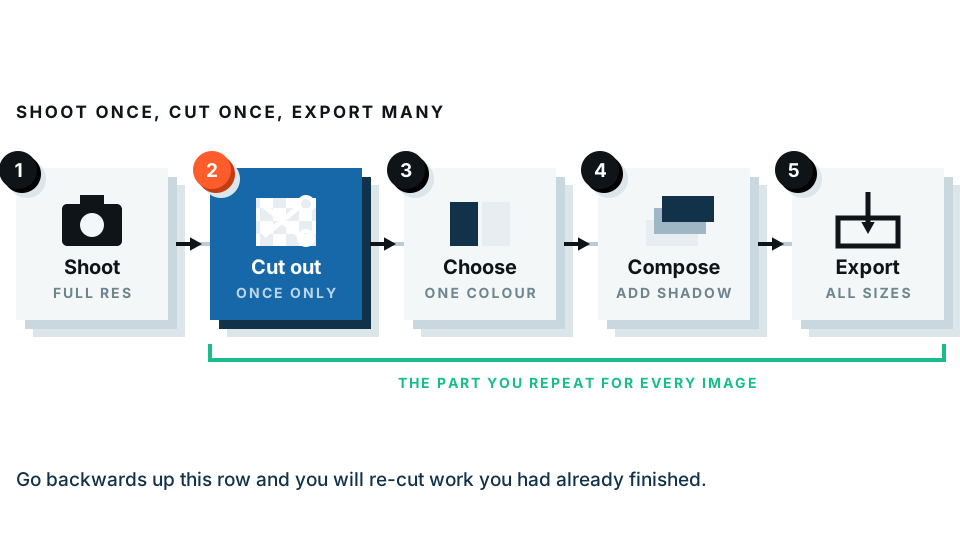
Quick summary: shoot the product once, cut it out cleanly, then generate as many scenes as you need. The cutout is the whole game — everything downstream depends on it.
Start where every one of these workflows starts. Cut your product out — the free preview runs in your browser, so unreleased product images never leave your device.
What changed, and why now
Three things arrived at roughly the same time.
Cutouts got good. Automatic subject detection now handles most product shapes accurately, including handles, straps and gaps. Ten years ago this was a manual pen-tool job costing a pound or two per image at scale.
Generation got controllable. Early image models produced pretty pictures you could not direct. Current tools let you describe a surface, a light direction and a mood, and get something usable on the first or second try.
Compositing got automatic. The hard part was never the background — it was making the product look like it belonged there. Shadow generation and light matching now happen without a retoucher.
Put together, the marginal cost of an additional product scene fell from hundreds of pounds to roughly nothing. That is the actual story. Whenever the marginal cost of something falls that far, behaviour changes.
What AI backgrounds are genuinely good at
Volume and consistency
If you sell forty items and want each on the same warm oak surface, generated backgrounds give you exact consistency across the whole range. A physical set drifts — light changes, the surface moves, someone knocks the reflector. Generated scenes do not.
Seasonal and campaign variants
Autumn scene in September, festive in November, bright and airy in January. You are not reshooting; you are re-placing. A small shop can run the same seasonal cadence as a large one.
Testing what actually sells
This is the underrated benefit. Because variants are cheap, you can run the same product on four different backgrounds and let the data tell you which one converts. That test was previously unaffordable for anyone below enterprise scale.
Space you do not have
A generated kitchen is available to a seller working from a spare bedroom. So is a beach, a boutique interior and a studio sweep.
Where AI backgrounds still fail
Being honest about this matters more than the sales pitch, because a bad composite is worse than a plain background.
Reflective and transparent products. Glass, chrome, polished metal and anything with a mirror finish should reflect their surroundings. Drop a chrome kettle onto a generated kitchen and it will still be reflecting your old room. Customers may not articulate why it looks wrong, but they feel it.
Contact points. Where an object meets a surface, there is a shadow, sometimes a slight compression, sometimes a reflection in a glossy top. Get that wrong and the product floats.
Scale cues. Generated scenes have no real sense of how big your product is. A mug placed at the scale of a bucket is a common and instantly obvious error.
Anything the customer must judge accurately. Colour-critical items — paint, fabric, cosmetics, anything where the buyer is matching a shade — need honest lighting, not a warm generated glow that shifts the colour.
Textiles on a body. Clothing on a generated model is a different and much harder problem than a product on a generated surface. Approach with caution.
The five rules of a believable composite
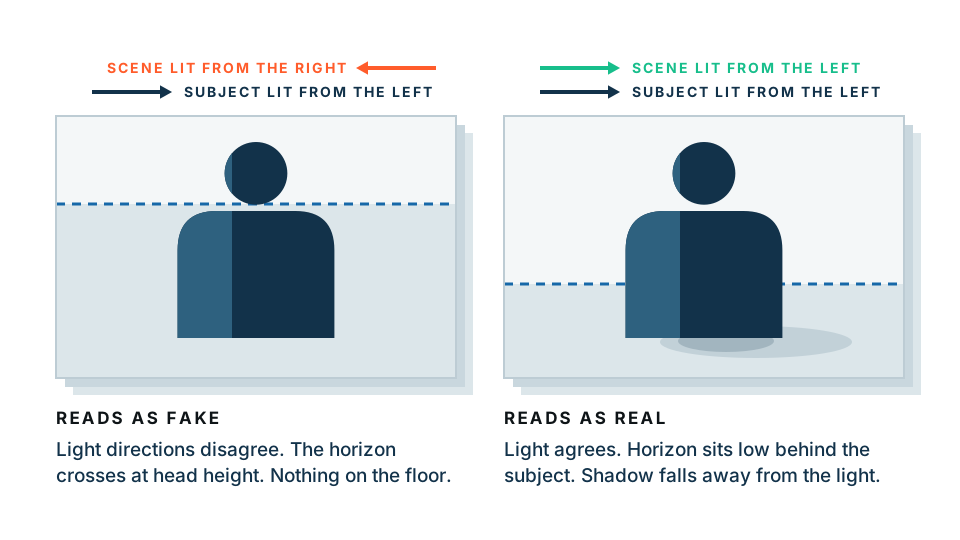
- Match the light direction. Look at your product photo. Where is the highlight? If the light comes from the upper left, the generated scene must be lit from the upper left too. This is the single biggest tell.
- Keep a contact shadow. A soft, dark area directly under the product where it touches the surface. Without it, nothing looks placed — it looks pasted.
- Match the colour temperature. A cool blue product shot on a warm golden-hour scene reads as two photographs. Warm or cool your product slightly to meet the background.
- Respect scale and perspective. If your product was shot from slightly above, the background’s surface must recede at a matching angle. A head-on product on a steeply angled table looks tilted.
- Add a little grain or blur. A perfectly sharp product on a slightly soft background is a giveaway. Match the depth of field — the further parts of the scene should be softer than the product.
The workflow, start to finish
Step 1: shoot the product properly
AI does not fix a bad product photo — it makes a bad photo appear in more places. Spend the time here.
- Diffused light from one side. A window with a net curtain is fine.
- A plain background that contrasts with the product. This makes the cutout accurate.
- Shoot at the height the customer would view it from.
- Keep the product sharp front to back. Small aperture if you have manual control.
Step 2: cut it out cleanly
Everything after this inherits your cutout’s quality. Check three things at full zoom: handles and holes, thin parts like straps and stems, and any semi-transparent element.
Use the background remover for this. Its free preview processes your image inside your browser — no upload — which is genuinely useful when the product has not launched yet and you are working from a supplier sample. The paid full-resolution download is processed on our server; that is the honest split.
Step 3: choose or generate the scene
Describe the surface, not the mood. “Honed white marble worktop, soft daylight from the upper left, shallow depth of field” produces something usable. “Beautiful luxury kitchen” produces something generic.
Step 4: composite and check the shadow
Place the product, scale it to something plausible, and add the contact shadow. Then look away for a minute and look back — first impressions catch errors that staring does not.
Step 5: export at the right size
Check your platform’s requirements. Most marketplaces want at least 1600 pixels on the longest side so the zoom feature works. Under-sizing here costs you conversions regardless of how good the scene looks.
What marketplaces actually allow
Rules vary and change, so check the current policy for your platform before you rely on this. As a general shape:
| Image | Typical requirement |
|---|---|
| Main listing image | Product on plain white, no props, no text, fills most of the frame |
| Secondary images | Lifestyle scenes usually allowed, including generated ones |
| Ads | Often stricter — some networks require disclosure of synthetic imagery |
| Own website | Your rules, but customer trust is still the limit |
The practical implication: you need both. A plain white background version for the main image, and generated scenes for everything after it. One cutout gives you both, which is why the cutout comes first.
The ethics line, plainly
There is a difference between changing the setting and changing the product.
Changing the setting — putting a real mug on a generated table — is staging. Photographers have always staged. Nobody thinks the studio sweep behind a shampoo bottle is a real room.
Changing the product — making the fabric look thicker, the colour richer, the item larger than it is — is misrepresentation. It generates returns, bad reviews and, in some jurisdictions, legal trouble.
The rule that keeps you safe: the product in the image must be an accurate photograph of what arrives in the box. Everything behind it is set dressing.
So is this really the future?
The direction is clear enough. Physical set building for routine catalogue photography is becoming a specialist choice rather than a default, in the same way that film became a choice. What is not going away is the accurate photograph of the actual product — the thing generation cannot invent because it does not know what you sell.
The practical takeaway for anyone selling online: get very good at one thing, which is a well-lit, honest product shot with a clean cutout. Everything else is now cheap and repeatable.
Make your cutout and see how many scenes one photo can carry.
Frequently asked
What is an AI-generated background?
A scene created by software rather than photographed. You cut your product out of its original photo, then place it on a generated setting such as a marble counter or a sunlit table.
Are AI backgrounds allowed on Amazon and Etsy?
Main listing images on most marketplaces must be the product on a plain white background with no props. Generated scenes are fine for the secondary lifestyle images that follow.
Do AI backgrounds look fake?
They look fake when the lighting and the shadow do not match the product. Match the direction of the light, keep a contact shadow where the product meets the surface, and most people cannot tell.
Do I still need a photographer?
Yes, for the product shot itself. AI replaces the location, the props and the set build — not the accurate photograph of what you are selling.
What is the first step to using AI backgrounds?
A clean cutout. Every generated scene sits on top of a transparent PNG of your product, so the quality of the cutout sets the ceiling for everything after it.