Logos & graphics
Remove Logo Backgrounds With Ease
Turn a logo trapped in a white box into a clean transparent PNG that works on any colour, in any document, on light and dark backgrounds alike.
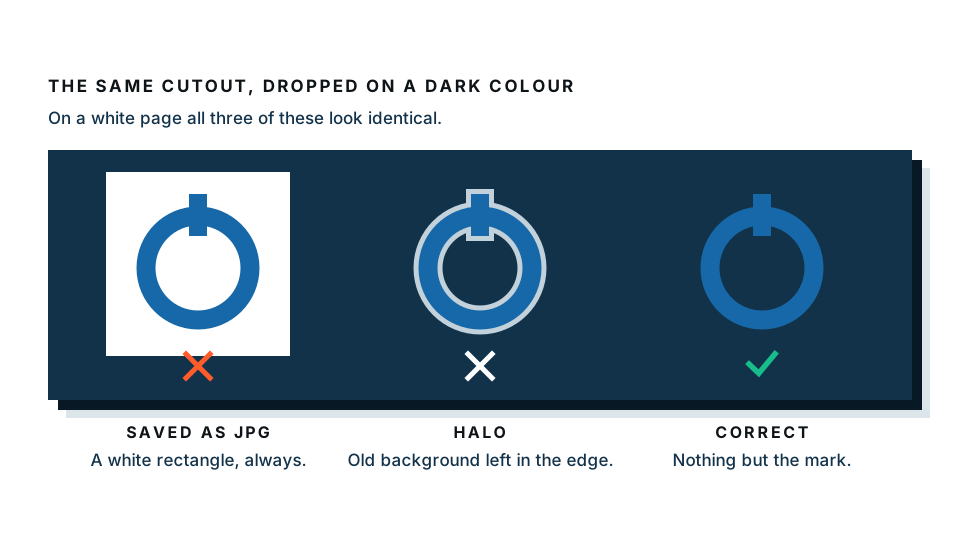
You have your logo. It looks fine on white. Then you put it on a coloured slide, a photo header or an email footer, and there it is — a white rectangle sitting behind it like a sticker someone forgot to trim.
This guide fixes that properly, and covers the things that come up straight afterwards: dark backgrounds, print, favicons, and when a PNG is not enough.
Quick summary: the white box is there because the file is a JPG. Remove the background, save as PNG, and keep a second version for dark backgrounds.
Got the file to hand? Make your logo background transparent — the free preview runs entirely in your browser, so your brand assets are not uploaded anywhere.
Why does a logo have a white background at all?
Two reasons, and it helps to know which one you are dealing with.
It was saved as a JPG. JPG has no way to record “this pixel is empty”. Every pixel must be a colour, so the empty ones become white. Nothing is wrong with your logo — the container simply cannot hold transparency.
It was designed with a background. Some logos genuinely include a coloured or white panel as part of the mark. If yours does, removing it is a brand decision, not a technical one. Check with whoever owns the brand guidelines before you strip it.
An alpha channel is the piece of information a PNG has and a JPG does not: a value per pixel saying how opaque it is. That is the entire difference.
The fastest method: automatic removal
Best for a logo you have as an image file — a PNG or JPG, exported from somewhere, or pulled from a slide deck.
- Open the transparent background maker.
- Drop your logo file in.
- The background is detected and removed automatically.
- Check the preview against the checkerboard — that pattern means genuinely transparent.
- Download as PNG.
Logos are the easiest possible case for automatic removal because the edges are usually clean and the background is usually flat. This takes seconds and needs no skills.
What to check before you download
- Counters. The enclosed spaces inside letters — the middle of an O, the hole in an A. These should be transparent too, not filled white.
- Thin strokes. Fine lines in a wordmark can get eaten. Zoom in.
- Soft shadows. If the logo has a drop shadow, decide whether you want it kept or removed. Keeping a shadow that was designed against white will look wrong on a dark background.
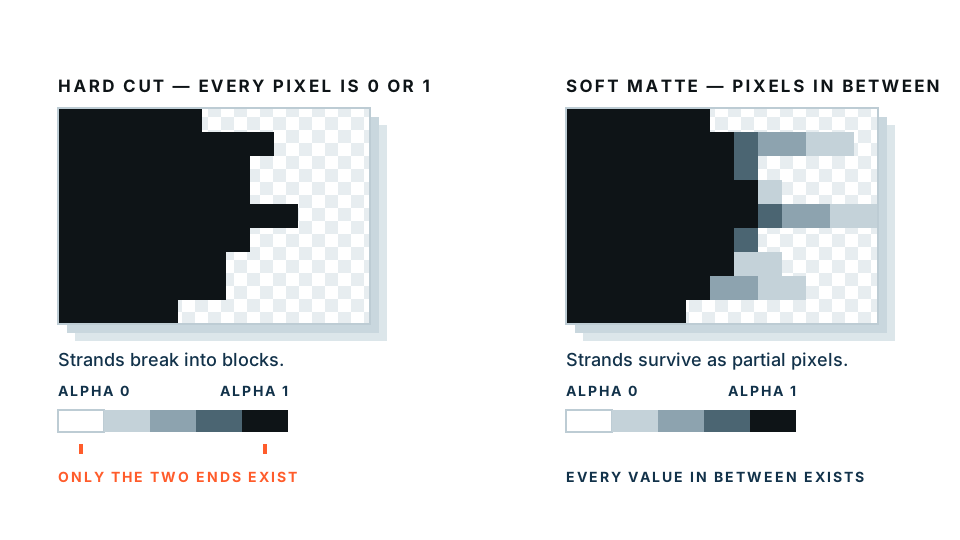
- Anti-aliased edges. The slightly softened pixels at every edge. These should fade out, not end in a hard white fringe.
The manual method, if you want more control
If you have a design tool open anyway, or the automatic result needs help.
In Photoshop
- Open the logo. Duplicate the Background layer and hide the original.
- Select the visible layer, then choose Select → Colour Range.
- Click the white background with the eyedropper. Adjust Fuzziness until the white is selected but the logo is not.
- Click OK, then press Delete.
- Zoom in and check the counters. Shift-click to add any that were missed, then delete again.
- File → Export → Export As, choose PNG, tick Transparency.
In GIMP
- Layer → Transparency → Add Alpha Channel. Without this, delete gives you white.
- Pick Fuzzy Select (U), set threshold around 20.
- Click the white background. Shift-click each counter.
- Select → Shrink by 1 pixel, then Select → Feather by 1 pixel.
- Press Delete.
- File → Export As, filename ending .png.
In a vector tool
If the logo exists as vector artwork — an AI, EPS or SVG file — there is nothing to remove. Open it, select the background rectangle, delete it, and export. Vector logos have no background unless someone drew one.
Halfway through and the counters keep filling in? Let the automatic tool do it and compare. It handles enclosed shapes without you clicking each one.
PNG or SVG? Which does your logo need?
This is the question that decides whether your logo works forever or only until someone puts it on a banner.
| Format | Scales? | Transparency | Best for |
|---|---|---|---|
| SVG | Infinitely, no quality loss | Yes | Websites, signage, print, anything large |
| PNG | No, blurs when enlarged | Yes | Slides, documents, email, social profiles |
| JPG | No | No | Nothing, for a logo |
| Yes, vector inside | Yes | Sending to a printer |
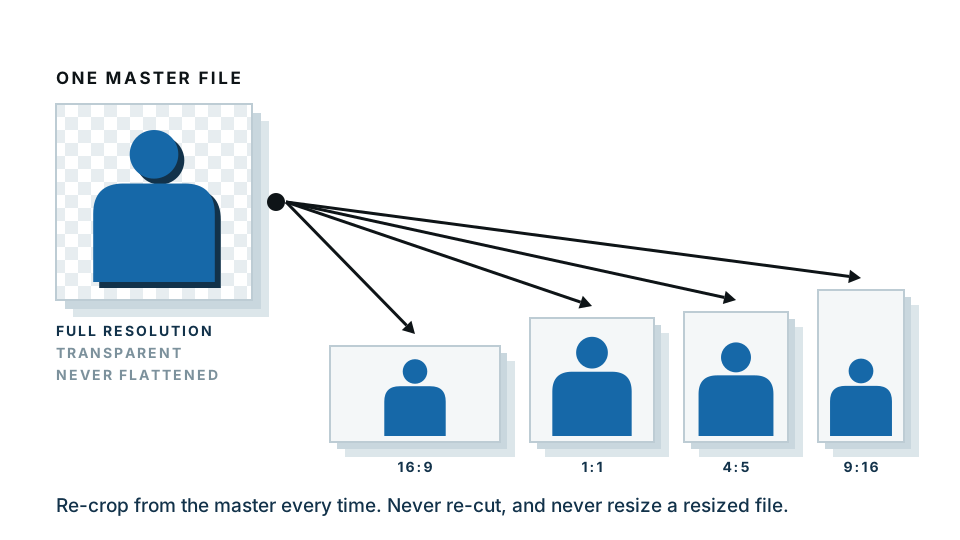
The practical answer for most people: get an SVG from whoever made the logo, and keep a large PNG — say 2000 pixels wide — for everything else. Export smaller PNGs from the large one as needed.
If you only have a low-resolution PNG and need it big, no removal tool will help. You need the artwork redrawn as vector, either by tracing it in a vector editor or by asking the designer for the original file.
Build a proper logo kit while you are here
Do this once and you will stop hunting for the right file every time.
- Full colour, transparent PNG — the everyday version, 2000px wide.
- White or light version, transparent PNG — for dark backgrounds and photo headers.
- Black or single-colour version — for faxes, stamps, embroidery, anything one-colour.
- SVG of each of the above.
- Square icon version — the mark without the wordmark, for social profiles and favicons.
- Favicon at 32 x 32 and 180 x 180 pixels.
Put them in one folder with clear names — logo-colour.png, logo-white.png, logo-mark-square.png — and share it with anyone who needs it. This single folder prevents most brand inconsistency.
Where the transparent version actually matters
Email signatures. A white box in a signature looks broken in dark mode, which a large share of readers now use.
Slides. Any deck with a coloured or photographic title slide.
Watermarks. A semi-transparent logo over a photo requires an alpha channel by definition.
Merchandise and print. Printers usually want vector, but transparent PNG is the minimum they will accept for a mock-up.
Website headers. Especially if the header colour changes on scroll, or if you support a dark theme.
Video overlays. A bug in the corner of a video must be transparent or it becomes a white block.
Common problems
There is a faint grey outline around my logo. The old white background survived in the anti-aliased edge pixels. Shrink the selection by a pixel before deleting, or use an automatic tool that handles the fade.
The middle of my letters is white. Enclosed counters were not included in the selection. Shift-click each one, or use a tool that detects them.
My logo disappears on a dark background. The logo is dark, and now that the white panel is gone there is nothing to separate it. You need a light version — this is a design fix, not a technical one.
It looks blurry when I make it bigger. You are enlarging a PNG. Find the SVG, or have the logo redrawn as vector.
Transparency shows in my editor but not on my website. Check the file you actually uploaded is the PNG and not an older JPG with the same name. Clear your cache and reload.
Do it now, once
Removing a logo background takes about ten seconds and solves a problem you will otherwise hit every month for years. Do the full-colour version, then the white version, then save both somewhere sensible.
Make your logo transparent — free preview, processed on your own device, nothing uploaded while you check the result.
Frequently asked
Why does my logo have a white box around it?
It was saved as a JPG. JPG cannot store transparency, so every empty pixel becomes white. Removing the background and saving as PNG fixes it.
What file format should a logo be?
SVG for anything that scales — signage, print, large web headers. PNG with transparency for everyday use in documents, slides and email signatures. Never JPG for a logo.
How do I make a logo work on a dark background?
Remove the background so it is transparent, then check whether the logo itself is dark. If it is, you need a light or white version too. Most brands keep both.
Can I remove the background from a logo I found online?
Technically yes, legally it depends. Use your own logo, or one you have permission to use. A downloaded logo is still someone's trademark.
Will removing the background reduce my logo's quality?
No, if you start from the largest version you have and save as PNG. Quality is lost by starting from a small or heavily compressed file, not by the removal itself.